Monday, October 25, 2010

How To Use Your Camera - With a Tripod

How to use your camera includes how to use your camera on a tripod. Most new tripods have a base plate that attaches to the bottom of your camera. That's what that little ¼ inch screw hole is for. In some instances you will attach the camera directly to the tripod head. I like the base plate idea since I can remove the camera from the tripod and put it back as needed. I just leave the base plate attached to my camera most of the time.

The first thing you should do is learn to take a self portrait while using your tripod to hold the camera. Decide where you want to be and what background you want. Then point the camera at the area where you will be. Turn on the auto timer, activate the shutter, and then go pose in front of the camera. When you check your image you will know what adjustments to make to your position or the position of the camera and tripod. Take shots with the camera in landscape position then tilt the camera on it's side and shoot portrait images. Experiment with close-ups and wide angle shots until you get several images in each position that you like.

Now find a subject on the ground or floor to take shots of. This could be a flower, bug, mushroom, pet cat or dog, whatever interests you at the time. It should be something that won't move very much. With your camera on the tripod, lower everything until the camera is as close as it can be to your subject and still focus. If your camera has a Macro setting, turn it on as it will help you get as close as the camera can get. Shoot several images from above, to the side, from the back and any other angle you can think of. Just keep moving the tripod around and framing your shots then take the pictures you have created.

Did you ever see those sports photographers with cameras that have long sticks under the camera or the lens? The stick is called a “Monopod.” Most are adjustable so that you can adjust the length, and some have the same kind of heads that will hold removable base plates like tripods do. Some folks like monopods because of their small size and weight. Personally, I avoid them. I can do anything a monopod can do with a tripod by simply extending only one leg. But I still have the option of using the tripod when I want as well.

To use your tripod as a monopod, close the legs up together. It doesn't matter if you have one or all of them extended. Just be sure to fully extend at least one of them. The tripod should be about as tall or a little taller than you are with the camera attached. When you use a monopod, you are still creating a tripod, it's just that two of the legs are the ones you are standing on. Put the tripod out in front of you so you are slightly leaning into it to make it as steady as possible. This is why it needs to be longer than a walking stick.

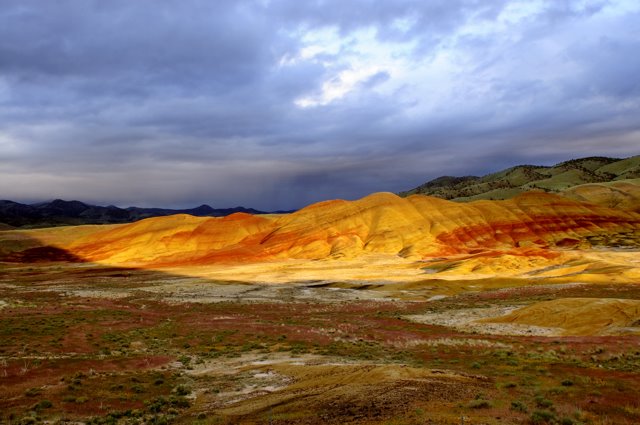
Practice taking shots of moving subjects such as kids at games, running animals, cars on the street, and so on until you feel comfortable with the process, then open the legs and take some landscapes using the tripod. Again put your camera in both landscape and portrait positions and shoot until you are comfortable with all the features of the tripod you are using.

I hope you found this article interesting and useful. I know that a tripod will improve your photography a great deal. Most Pro's will buy a better tripod before they will buy a new camera or lens. It's that important to them.

Please send comments if this article was helpful to you or if you would like information about other topics.

If you are looking for books about how to use your camera click this Book Store link to see what is available. Need a Camera? This Camera Store has the the best choices available on the internet.

You can also visit my own photography website at Dwains Picks to see some of my work.

Thanks for visiting and I hope you will check this site often.

Saturday, October 23, 2010

How To Use Your Camera - The Tripod

The single most important accessory you can have to help you learn how to use your camera is a tripod. I have two and use them all the time. One is small and light weight and the other bigger and heavier. I use the small one when I'll be doing a lot of walking with lots of other gear. The bigger one gets selected most of the time because it is solid as a rock. It's a bit heavy and predates the newer carbon fiber tripods but it still works really well.

You can find tripods in most department stores and in any camera store that will work for you. To choose one, take your camera with you and try them out. Get the one that will hold your camera steady indefinitely in all positions. My camera is too heavy for my small tripod when tipped sideways for portrait shots. It worked for my previous camera if I didn't have long heavy lenses in place. It works perfectly for my point and shoots. For now the important thing for you to do is buy or borrow a tripod and get ready to learn to use it. My next posts will cover this topic in detail so keep coming back.

Watch this site for more information about how to use your camera and the tripod together.

Please send comments if this article was helpful to you or if you would like information about other topics.

If you are looking for books about how to use your camera click this Book Store link to see what is available. Need a Camera? This Camera Store has the the best choices available on the internet.

You can also visit my own photography website at Dwains Picks to see some of my work.

Thanks for visiting and I hope you will check this site often.

Saturday, October 16, 2010

How To Use Your Camera - Built In Light Meter, what it does

Something you should know as you continue to learn how to use your camera, is what your built in light meter really does. These are really remarkable tools these days but you still need to be aware of their limitations.

Back in the early days of light meters, scientists determined that of all the light provided by the sun, only an average of about 18% of that light was reflected from any surface. Photographers refer to the tone of this reflected light as 18% gray. Ansel Adams took this concept much further but for me to go deeper into this here would take many pages that I am sure you don't want to read just now. So for now, just accept that something near 18% of available light is actually reflected back to your eye, and to your camera.

Because of this, most but not all built light meters are designed to calculate apertures and shutter speeds for your automatic exposures based on an average light reading of 18% gray. Some camera manufacturers have determined to use a slightly different value but for all practical purposes the idea is the same. You can see this in your photos. Have you ever taken a shot of a bright object such as a snow or beach scene only to find your image looking gray rather than white? You can try this if you want by setting your camera to auto everything and shooting a picture of a piece of white paper or some other bright object.

This is why your point and shoot camera may have special scene modes for things like portraits, beach, snow, landscapes, and so on. The manufacturer has decided to help you properly adjust your exposures by attempting to provide clues as to the kind of light scene you might be shooting in. If your camera doesn't have these features, you can still make corrections if it has an exposure lock feature.

In this instance you move your camera as close as possible to the subject you are trying to photograph, letting the meter read light directly from the subject, activate your exposure lock and then recompose your photograph and shoot.

Digital SLR users have more control over this, as do many of the more elaborate (expensive) point and shoot cameras. Continue learning how to use your camera by spending some time experimenting with this. Adjust your scene modes and white balance settings until you feel comfortable with the results and where to find the menu options. You will find that your photos will not be as dark and gray, but the colors will be richer and more true to what you actually see with your eye.

Please send comments if this article was helpful to you or if you would like information about other topics.

If you are looking for books about how to use your camera click this Book Store link to see what is available. Need a Camera? This Camera Store has the the best choices available on the internet.

You can also visit my own photography website at Dwains Picks to see some of my work.

Thanks for visiting and I hope you will check this site often.

Saturday, October 9, 2010

How To Use Your Camera - The Electronic Analog Exposure Meter

A lot of the people I visit with or coach about how to use your camera have no idea what this handy tool does, or for that matter how to use it. Most will turn it on accidentally, then work like the devil to turn it off again. I intend, as briefly as possible, to help you not only understand what it does but help you use it to your advantage.

Most camera's offer this tool but it isn't always turned on or it only displays when in a certain shooting mode. You may need to spend some time with your manual to figure out how to find and turn the meter on for your camera. The professional-grade cameras make this easier because the pros use this tool a lot. My Nikon D300 displays a meter in the viewfinder and on the control panel. It's that important if you want to have total control over your exposures.

The Electronic Analog Exposure Meter consists of a row of little vertical bars or possibly little dots. An example may look something like this: “+3..+2..+1..0..-1..-2..-3.” This would be a meter graduated to 1/3 steps between each full stop. A meter graduated to ½ steps would display a single dot or bar between each full stop.

The “+” sign indicates an increase in exposure while the “-” sign indicates a decrease in exposure. Exposure is simply the amount of light allowed to reach your film or sensor. It is controlled by either the shutter speed, or the size of your lens opening or “aperture,” usually both. If your meter is indicating an exposure in the + area, more light is being allowed in, if it is on the – side then less light is being allowed to pass. Ideally you should adjust you meter to the center for you first exposure. See how it appears to your eye and your histogram. You can then make adjustments by changing either your shutter speed or your aperture to get the exposure you want.

With your camera in hand and set to manual control or shooting mode, go out and take a few pictures while adjusting the shutter speed and aperture to see how it affects your meter readings and what the images will look like. I will take this topic further in a later post, so be sure to check back for more information about your exposure meter as you continue to learn how to use your camera.

Please send comments if this article was helpful to you or if you would like information about other topics.

If you are looking for books about how to use your camera click this Book Store link to see what is available.

Need a Camera? This Camera Store has the the best choices available on the internet.

You can also visit my own photography website at Dwains Picks to see some of my work.

Thanks for visiting and I hope you will check this site often.

How To Use Your Camera - The Rule of Thirds

One of the best and easiest ways to compose your scenes within your viewfinder is by utilizing the Rule of Thirds. To do this you activate your cameras reference grid so you can see the lines either on your monitor or inside your viewfinder. If your camera doesn't have this feature (rare) you can simply imagine a tic-tac-toe pattern within the viewfinder or monitor.

As you view the scene you intend to shoot, you will want to position your main subjects along the lines of the grid, or at the points where the lines intersect. To see how this affects a photograph pick up any magazine or book with pictures in it and try to determine where the main subject is located within the photo. Check out where the horizon is in landscape scenes. You will note that it is almost always either in the vicinity of the upper or lower lines, and almost never in the middle. Note that in most of the other pictures the main subject is almost never in the center either. This is what we want to be able to do too.

Now with your camera, turn on the reference grid and take a bunch of pictures using this method to position your subject. Do it with close-ups, wide angle shots, everything. Have fun, and decide if this didn't help you take better pictures. Remember to avoid placing your subject in the dead center. Also the lines are a reference only, you want to use them to give you the “general area” rather than the “exact position” of your subjects as you compose your shots.


Please send comments if this article was helpful to you or if you would like information about other topics.

If you are looking for books about how to use your camera click this Book Store link to see what is available.

Need a Camera? I researched this topic and this Camera Store has the the best choices available on the internet.

You can also visit my own photography website at Dwains Picks to see some of my work.

Thanks for visiting and I hope you will check this site often.

Friday, October 8, 2010

How To Use Your Camera - The Viewfinder

Not every camera has a viewfinder that you look through. Some have a monitor or screen on the back that allows you to see what the camera is pointing at. Some cameras such as SLR's have what is called “through the lens technology” which means that a prism in the viewfinder allows you to actual view your scene through the lens. Cameras without viewfinders but with viewing screens do the same thing but display the scene on the cameras monitor.

There can be a lot of information available about the scene you are viewing that is very helpful to you. One of my camera's actually display's 27 different pieces of information in the viewfinder as I look through it. This can include the shutter speed, f/stop, analog exposure meter, battery status indicator, focus point, in focus indicator, and much more. One optional item that most cameras allow you to display is called a “Reference Grid.” Not every camera has this feature but most of them do. Here's how to use it.

Look at your camera's manual and figure out how to turn the reference grid on and off. I usually leave mine turned on. You use this grid to help keep a level horizon in your pictures and to help you position your subjects. Where you position your subject within your frame is virtually everything that photography is all about. Most of your reference grids will look like a tic-tac-toe board either in your viewfinder or on your monitor panel. There will be nine rectangles or squares and your screen will be divided into thirds. The lines help you use the Rule of Thirds as you compose your images which I will write about in my next post. For now just take some pictures while trying to put your main subject either on or near the grid lines or the intersection points. Use the lines to position your landscape horizons too. You'll like the results. Watch for my next post about the “Rule of Thirds.”


Please send comments if this article was helpful to you or if you would like information about other topics.

If you are looking for books about how to use your camera click this Book Store link to see what is available. Need a Camera? This Camera Store has the the best choices available on the internet.

You can also visit my own photography website at Dwains Picks to see some of my work.

Thanks for visiting and I hope you will check this site often.

Photography Tips

Here are a few things you can do to improve your photography that will apply regardless of what camera you use. These are the basics that every photographer should know and do to get reasonably good pictures out of any camera.

Make sure you have a clean lens. Don't just blow the dust off, but use a clean cloth suitable for cleaning lenses and do it right.

Set up so your camera is stable and won't move as you press the shutter. You can do this a number of ways. If you will be handholding the camera, hold your elbows in against your sides, and stand with your feet apart with one slightly forward of the other. You can also lean against a solid object like a light pole, tree, building or whatever. The best method though is to use a tripod or monopod. I have both but I like to carry the tripod best. If I want to use it as a monopod I just extend only one leg and us it as I would a monopod. I'll add instructions about to how to use these tools later.

Finally the "First" basic thing you need to do is read your manual and learn what all the parts of your camera are for and how to use them. If you understand how your meter works and what white balence is you'll go a long way to getting that shot you want when the light is wierd and you are wondering why your pictures are all dark or yellow instead of like what you saw on the monitor or in the viewfinder.

I'll expand on all these topics in the coming weeks and months so you'll want to check back and see what I've added from time to time.