Tuesday, November 24, 2009

Which Camera ?


Which camera should you choose? Well some folks have only one so that makes it easy. You use what you have. But sometimes we have a choice.

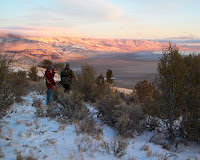
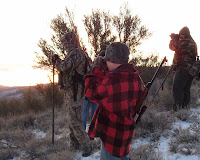
I was recently involved in a very arduous outdoor experience. Taking my big D300 and tripod along with the backpack bag and assorted lenses would have been ideal. But, we were hunting deer and I didn't want to lug all that equipment around while trying to help my grandson fill his tag. I wasn't shooting a film or documentory, but I wanted nice shots to record the event.

One of my backup cameras is a little Kodak EasyShare V1253 point and shoot. It fits in my shirt pocket, takes good close up movies and snapshots, and shoots at 12megapixels. This camera, equipped with a 1gb memory card and a spare battery would be my choice for this trip.

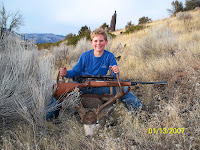
As you can see from the images below, the little Kodak camera has done a great job of capturing our event. The day was very cold and very windy with blowing snow at times. Using the little Kodak in this instance was an advantage over my Nikon D300. A Camera I really like.


The only problem I had with my Kodak was that for some reason it would loose the date and time. Because I didn't have my eye glasses I could not see the menu's to make corrections. This was frustrating and the date stamped on my images is incorrect. I will either crop this or otherwise edit it out on the computer but it's something that should not have happened.

Tuesday, November 3, 2009

Tips for Digital Nature Photography

Tips For Digital Nature Photography
By [http://ezinearticles.com/?expert=Dennis_Oh]Dennis Oh

Digital nature photography is almost always taken outdoors. These are rarely taken indoors since houses and buildings are not really the natural habitat of most wildlife specimens and other nature based photographs. Digital nature photography can be categorized into landscape photography, plant photography, wildlife photography and close up photography pertaining to wildlife and other scenes which may be associated with nature and maybe natural texture. The following nature photography tips work for many pro photographers.

Eye Level

For many photographers, digital nature photography works when they shoot an animal or wildlife subject with the subject's eyes within the eye level of the camera. This kind of angle brings a closer and more personal touch to most photographs. Viewers also appreciate the personal nature of this kind of digital nature photography. The perspective of the photographer should be the same eye level of the subject. An example of this is to photograph a frog on the ground while laying flat on the same level ground, instead of shooting while standing or kneeling. This means that dog's pictures should be taken at their level.

Establishing The Subject

Many pro photographers of digital photography for nature often define what they want to take a picture of before they even start out to look for it. For others, inspiration strikes them while they look at nature. For those with a purpose, it may be best to seek out particular things to take pictures of rather than wait around for inspiration to strike. Making up one's mind regarding what the subject may be will help a person establish what should be in the photograph and what should not be. In digital nature photography, certain angles when taking photographs will bring clutter into the picture. Work out which angles omit clutter or things which are unwanted and then shoot several pictures to pick out the best among them. This is the advantage of digital nature photography; one can shoot many different shots from different angles without the loss of film.

Be At Ease With Nature

This is one of the most important facts of digital nature photography. A person who wishes to take part of digital photography for nature should be at ease with nature itself and be aware of what goes on wherever he or she is. Knowing what to look for may take several exposures to nature such as walking around in the woods or just sitting in one's yard and observing nature as it goes through life.

Don't be frustrated with not being able to take high-quality photos using your Digital Camera. [http://wengkian.com/recommends/learndigitalphoto]Click here now for a free [http://wengkian.com/recommends/learndigitalphoto]Guide to Digital Photography

Article Source: http://EzineArticles.com/?expert=Dennis_Oh http://EzineArticles.com/?Tips-For-Digital-Nature-Photography&id=2996078

Wednesday, October 21, 2009

I really like this rendition of The Three Arches near Cape Meares, Oregon. I used the Monochrome feature of my Nikon D300 set to Sepia. I also used a high ISO, a small aperture for depth and fast shutter to freeze the grasses. This is number 54 of the 55 images I kept and is from the fourth tripod position.

The text above is what I wrote on facebook when I first published this image.

I used those settings because the day was very difficult for landscape photography. It was one of those days when the fog is thin and the clouds high with the sun making the sky very bright. This made the light range between the lights and darks too much for my camera to handle in normal modes. I tried using the feature my camera has of overlaying images but that didn't work well either.

As I set up to shoot this scene the wind came up and began blowing the grasses around which I didn't want. I set the ISO to 1250. That's really high, but I knew it would allow me to use a faster shutter speed and a small aperture than at 200 or 400 where I usually set the ISO. Next I set my aperture to F/29 for a deep depth of field. I also set focus to manual and hyper-focused the lens. I wanted the grasses and foreground in focus so I set the focal length slightly long for the grasses and let the small aperture take care of rocks in the background. Oh! my lens is the 18-200 Nikkor zoom that came with the camera. I left vibration reduction on but did not think to set it to the tripod setting. I was mounted on my old Bogan-Manfrotto 3220 with the 3030 head.

As I said before I used the monochrome setting set to sepia for this shot but I also used several other settings and filters as I worked my way along. The bright sun reflecting off the water caused me to re-position my camera so I could remove the blown highlights. My histograms kept climbing both ends of the scale until I went with the monochrome settings. I really didn't know what I was doing here since I don't usually shoot in this mode. I depended totally on the histograms to show me what was going on. My eyeglasses are the kind that darken in sunlight and without them I couldn't see my camera settings and with them the images on my screen were not true renditions of the images. The histograms made all the difference for me. Eventually I discovered that underexposing the image by 2/3 stop brought the lines off the histogram walls.

It was a good day!

Wednesday, September 30, 2009

I had the opportunity to try my Nikon D-300 at a football game under the field lights the other night. My initial camera settings of ISO 200 with the camera set to programmable mode did not do well. After trying a few different WB settings I decided it should be left at Auto since I wanted to work only one feature at a time until I understood what effect my setting changes had. I haven't had the opportunity to shoot in these lighting conditions before so I enjoyed the challenge. At the initial settings my camera was using the shutter speed was very slow, near 1/13 sec at F/5.6. All the images were blurred and even panning was difficult. Mostly because I didn't have a monopod or tripod with me.


Eventually I decided to bump the ISO setting up all the way. The top photo here was with an ISO of 200, the bottom with the ISO set to the equivalent of 6400. At this setting my shutter speed increased to 1/80 sec at F/5.3 for this image captured in the darker parts of the field. This allowed me to shoot multiple images and freeze most, but not all the action giving the images a sense of motion. I also changed my camera from it's Vivid setting to Standard thinking it might help speed things up. After viewing these images I think I should have left it at Vivid.

Sunday, September 27, 2009

Sports Photography

I had the opportunity to shoot pictures of my grandson (with the ball) playing football this past Saturday with my Nikon D-300. I used the kit lens that came with it. It's a AF-S DX VR Zoom 18-200mm f/3.5-5.6G IF-ED lens. I use it for most of the action work I do with this camera. I ended up with 1023 totally sharp frames by the time the game ended.

The game was being played in the late morning when the sunlight was very harsh. There were no clouds in the sky to soften it up so the shadows are very deep due the the high contrast. My camera settings were: exposure mode - P, ISO 200, White Balance - Sunny, Quality - medium/basic, continuous focus mode with the release mode set to high. I used "Dynamic Area Auto Focus set to 21 focus points. I didn't want to let the camera have total control of what would be the main subject. Picture control was set to vivid. I also set my camera to focus priority. I usually set my priority focus point in the upper center part of the frame. That way I keep the subjects heads at the top of the frame rather than in the middle and I don't usually cut off their feet or heads.

Because I want my images to all be in focus, the focus priority setting will prevent the camera from firing if it can't get the images in the frame in focus. This can be a bit exasperating when you want a shot and the camera won't work. I've learned that if I keep my focal length between 70mm and 200mm the focus points work well. If I go wider and use something between 18mm and 50mm or so, the camera is not likely to find a focus point and will delay shooting. I sometimes press the AE-L/AF/L button to force the shutter to fire in these instances and when I need the wider shot.

I use a 4GB Sandisk Ultry II CompactFlash card that reads at 15mb/s. It works well and has never failed. At the settings I used on the camera I still had about half of the cards capacity left by the time the game ended.

Friday, September 11, 2009

How To Photograph a Vintage Truck

I had a really neat opportunity pop up yesterday. These really nice people came into the park with an awesome vintage truck on a trailer behind their Bounder Motorhome.

I had been down at the lower end of the park photographing this railroad bridge while experimenting with the monochrome feature of my camera and met them when I returned to my rig.

We talked about doing some photography of the truck while parked on the lawn next to the river and decided to do it in the morning. I took some time to study some of my reference materials and a few online resources about how to photograph cars and trucks. All the tips I picked up came in really handy. Here's what I've learned so far:
  • Shoot from a 3/4 angle as you would for a portrait of a person. Get both headlights in the frame with the far one just barely visible to start. Work this pose with more and less angle until you feel you have it down.
  • Turn on the headlights, especially in the darker lighting situations. I forgot to do this!
  • Use a ladder and shoot from an elevated position. Again more around and get several angles.
  • Watch the light and use your flash even in bright sunlight. I actually got started too late. It was after 8:00 Oclock AM when I started and I should have been working this thing at daylight. The sky here was cloudless and the light became very harsh with high contrast and deep shadows. I set my on-camera flash to manual and full power. I also bumped my exposure from one to two stops . The paint on the truck has a reflective pearl fleck additive in it and the fenders were all white. This meant I had to shoot as if I were shooting snow. I had to watch the meter and my histograms closely to get it right. Even then I had a lot of editing to do in the computer later.
  • Use all your lenses. Well not all I guess. I used my nikkor 12-24 and my Nikkor 18-200 for all my shooting. I could get close and still have a fairly wide field of view with either lens and I needed it for this project. I also use a circular polorizer on the 18-20 lens. I have one for the 12-24 too but the light was changing so fast I didn't feel like I wanted to stop to go get it. It is with one of my larger lenses and I use a stepping ring to make it fit. I'm afraid I wasn't quite prepared in that respect.
  • Be sure to work all the chrome and the inside of the vehicle. I had to break out my own chrome polish to get the bugs off the mirror backs. I wanted to shoot the inside of the vehicle while keeping a large portion of the mirror back in the frame with a reflection of the hood or whatever. This took some work and the inside of the truck wanted to go dark due to the contrast. Getting some of the Chrome side moldings right took some work too. My favorite is a chrome piece that says FORD on it with the blue sky reflected in the shiney metal. It's really cool!
  • This truck has a polished wooden bed and round steel fuel tank mounted in the bed. My lighting situation didn't allow me to work that part of the truck so I'll be doing that tonight and tomorrow morning.
According to the owner, this truck was in really bad shape when he got it. He also had to manufacture a lot of his own parts since this type of rig isn't as commonly rebuilt as others. Because of that there is no demand to keep parts available. It took him four years to build the truck and I'd guess he worked on it just about every day.

All in all this is a really fun project and I'm looking forward to doing more photo work on it. I shot 72 frames this morning of which five of them turned out to be usable. That's a pretty good ratio for photography. I hope I can do as well next time.

I printed a few 4x6's and an 8x10 for the owner. I hope he likes them! This is the last image I shot. I used my 18-200 lens here and cropped in tight. I think I should have left a little more room in front of the rig Though. I'll do that next time.

Sunday, September 6, 2009

Now and Then

Every scene I attempt to capture with my camera has an impact on me. Every now and then one comes along that has a greater impact than others and I have just added one of these to my website and photo store.

I created this image using a feature in my camera that allows me to overlay two images to create a new image of both. You can do this with good film cameras too by exposing your film at different subjects without advancing the frame but you need experience and skill to do this well. You also need a camera that allows this kind of photography. Not all of them do this as they are designed to prevent us from ruining a previous exposure with a new one.

I used my Nikon D300 to create this image and when reviewed this scene on my computer later, I found that I did not want to edit it further. I didn't even crop it to a standard size. I decided to totally leave this image alone. You can find it in a new gallery called "Thoughts" at Dwains Picks

Saturday, August 8, 2009

HDR photography

  • HDR photography - There are three main factors that influence the quality of a digital image. The resolution is probably the most common. How many megapixels is your camera? Then, we have the compression. If you compress an image to make a smaller file ...

Landscape photography

  • 17 Examples of Jaw-Dropping Landscape Photography | Web Design ... - Everyone can take a photograph, but it's the ability to take stunning, atmospheric and unforgettable images that really set apart the amateurs from thepro's. We've compiled a list of 17 jaw-dropping images from the latest images on ...

  • Tips on shooting good landscape - Introduction. The question rose on dpreview a few days ago “How to shoot sunsets?” and resulted in a very interesting thread of 42 posts. In this article I will try, once more, to summarize this thread while also introducing to it some ...

Friday, August 7, 2009

New Storefront

This storefront is provided free with my Imagekind account. If your into photography and need an internet presence this could do it for you. Check out all the other sites that do this though as you could find something you like better.

Here's mine: http://DwainsPicks.imagekind.com/store

Copyright Infringements

Did you ever wonder if you would have to worry about people stealing your images? It can happen and most likely you will be really lucky if you can recover any money that should be yours. Here's what happened to me.

A couple of years ago I shot some photos of some fiddle players during a fantastic sunset. I silhouetted the players against the red sky and they loved it. I sold several images to them and was contacted by others who wanted to buy more. The local music association asked if they could use some of the images to promote their website. Of course I agreed to their use so long as it was a one time use and that I received photo credits on the website. Earlier this spring I was surfing the web looking for photography ideas and was surprised to find one those photos advertising a local art association website. They were even offering the image for sale! I was just a little hot over this. I called their phone number and left messages and sent emails until I finally got the image removed. Of course no money was ever made from their use of the image!

A little later I was asked to do a photo shoot for the local search and rescue dog team. I captured some great images and the SAR team was really happy. During one event with them there was another photographer from a local paper along. He was doing a story about the team and was also doing his own photography. I was asked to provide a few of my shots as well which I happily did. The SAR team is a great organization and I want to support them all I can. I did require that the use be one time only and of course I required photo credit in the paper with my name under the images. I even wrote my name on the back of the prints I provided along with the specific use requirements. Guess who's name appeared under the photos! It wasn't mine! I raised hell again but still the damage had been done. Well that was a couple of years ago.

Most recently there have been a couple of instances in which the SAR team has been called out and have performed their jobs beautifully. Guess which image has been popping up again with the articles in the paper and no, I have not been given credit for that image.

This last instance was a classic, the newspaper also has a website. The picture they have been using was a full size image on their front page and not only that they were offering it for sale in their stock photography site.

Here's the thing, that image is a really really popular photo with them. The continue to use it over and over without permission. But as soon as I tell them I own it and that they need to reimburse me for it's use, they backwater like mad. They've finally removed it from the stock photography site, and promised to contact me should they ever wish to use it again. Fat chance! Yes! I would be more than happy for them to use it, so long as my name is with it but after all the trouble it has caused I'll be surprised if I ever hear from them again.

Sooner or later I'm sure I'll be looking for an attorney who knows the law regarding copyright infringement. Until then I keep an eye out on my own.

In the meantime, if you do like me and allow a newspaper to use your images, be sure to track what they do with it. Once they get their hands on it they think they own it. They have their own publishing company and they will even print your images on calendars, or whatever. You can check this out yourself. Do a google search for any newspaper you like and open their home page. then look at their photo galleries and go from there. You'll see what I'm talking about.

I hope you find this article usefull. Be sure to visit my website at http://dwainspix.com to check out my photography and products at Zazzle.

If you are and RV'r or wish to become one you might be interested in our other two blogs. Check them out at D and D's RV Tips and at Dwain and Debbies Road Notes.
Monday, August 3, 2009

Shooting indoors with Natural Light

I had a challenging photo situation yesterday that I know everyone faces at some point. In most cases you let your camera try to figure out how to handle it but I wanted better pictures than that. I was inside a large show barn trying to photograph kids as they learned to judged 4-H horses. I was using my Nikon D300 and I knew it could handle this situation once I had the settings right.


The lighting inside the barn came from the two large open doors at the ends of the building and from windows along the side behind the bleachers. There were also semi-clear Plexiglas panes in the roof. Outside, the sky was mostly hard and bright sunlight but was becoming overcast with high clouds. It was also late afternoon and the light was hitting the windows at the side of the barn and coming in the door at the far end of the barn. In front of the camera.

I had initially set my camera to the "P" mode with white balance set to "shade." The problem was that my images came out dark, or with a strong yellow or amber tint to them and the shutter was rather slow. This made for blurry images as people and animals are always moving. I realized that the color problem was coming from an exposure setting on my camera that lets me saturate colors. I changed my setting from Vivid to Standard and finally Neutral. I also moved the ISO way up to 2500. I probably could have used something slower but I was trying to hurry and I just spun the dial. Next I set the camera to Aperture mode and moved the aperture to it's widest setting. That would allow me to attain more light and the fastest shutter speed possible. It also limits depth of field but at the distances I was shooting that wouldn't matter too much. Depth of field changes relative to distance and since I was so far away, I would have reasonable depth for any of the subjects I would frame.

As you can see from the photos above, the settings I finally chose worked well. The D300 handles the high ISO very well too although I should have set it a bit lower, say 800 or so. When you use high ISO setting you risk adding little spots and light aberrations called "noise." The D300 does a good job of preventing this from happening. I knew I wouldn't be creating large prints from any of these images but you never can tell. My most popular images are usually those that I did not plan and I simply captured at the moment because I had a camera handy.

Be sure to check out my website at www.dwainspix.com, and if you are an RV'r you might want to see what happened to my rig when a tire exploded last week. Check out my road notes blog at Dwain and Debbies Road Notes.

Monday, July 20, 2009

Family Portraits Outdoors on a Sunny Day

We had a family reunion this past weekend and as usual we finally got around to shooting group pictures of all the families that attended. Fortunately I was able to prevent what would have been a disaster. The day was a bright sunny one with harsh light and deep shadows. The place where we held the reunion has lots of trees and shady spots and I encouraged everyone to set up in one of those with a large tree as a backdrop. I worked out great. The family popirazzi got all their pictures without people squinting into the sun.

This is important to remember. Don't shoot portraits in direct sunlight if you can do it in the shade. People won't be squinting and colors and light areas won't be blown out. Remember to use the appropriate white balance too. Pose everyone as you wish but watch for bright spots where the sun breaks through the trees or branches. Don't allow these bright spots to land where they shouldn't. They will attract the eye and may cause distraction from you theme or main subject.

Go to my website at http://dwainspix.com to see samples of my work .

Tuesday, July 7, 2009

Three Tips for Shooting a Full Moon

Here are a couple of tips that I use when I want to shoot pictures of the full moon. The will help you get those dramatic shots that make people ask, How did he do that? I picked these tips up from magazine subscriptions I subscribe to.

Tip One: Suppose you want to get a picture with a huge moon just as it rises above the horizon. This can be very dramatic. Smoke and other pollutants can make the moon appear blood red as it first appears or as it sets. The best way to make the moon appear large is to use a telephoto lens zoom lens. I generally use either my Sigma 70 to 300mm or my Nikkor 18 to 200.

Tip Two: If you want to get all the detail of the moons craters and shadows, use your long lens and set your exposure to 1/500sec at F/11. The moon will appear bright and clear and the background will be dark.

Tip Three: This is my favorite. Shoot pictures when there are clouds moving across the sky illuminated by the moons light. I also like to silhouette trees in front of the moon with moving clouds passing by in the background.

Experiment with other exposure settings so you stop the clouds and also cause them to blur. Getting moon reflections in a pond or lake can be especially rewarding.

I hope you find these tips fun and useful

DV

Sunday, July 5, 2009

Fireworks


Did your fireworks shots come out? Lots of camera's have a special fireworks setting for capturing those fantastic shots, but it doesn't always work as you expect.

Because I use digital SLR's I set my camera to manual, selected a small aperture, set the shutter to bulb, the focus to manual and focused on infinity. The moon was out and I eventually focused on it, but since I was not using a tripod the images of the moon were blurry. I should have been using a tripod. I also used a zoom lens and tried several different focal lengths.

My wife uses a Nikon P80 though and manual settings do not work for her. She needs the camera to help decide what settings to use. The P80 has a fireworks setting but she found it didn't work for her. She got better results using the "Night Landscape" setting.

My grandson was using my old D70 with a zoom lens too. This kid always amazes me with what he captures and his fireworks shots were no exception. We set his camera to manual, turned off autofocus, set the shutter to bulb, and the the aperture to a small f/stop. He had a little trouble with focus early on but got it with a little help from me. I think he got more good shots than I and we were shooting the same scenes.

My intent with this post is simply to point out that even if your camera has a setting for everything, it may not capture the image as you want it. You don't have to simply accept what it does. Change the settings until you get what you want, not what the camera thinks you want.

I hope you found this post helpful and interesting. I also want to invite you to visit my website at www.dwainspix.com, and my galleries at http://DwainsPicks.imagekind.com/

Thanks for visiting
Dwain V

Monday, June 29, 2009

Kids and Cameras

Well I did it again! I was watching my grandson playing baseball while attempting to shoot all the action with my camera. Pretty soon I found myself watching the game instead of shooting pictures of the action. My older grandson came along and asked if he could take a few shots. I said why not since I wasn't doing the job myself. The pictures he got were remarkable to say the least. He was lying on the ground in the grass shooing away. These are good shots from an unusual perspective, and when I looked at them I decided he needed a little more telephoto the next day. I pulled out one of my old D70's and equipped it with a Sigma 70-300 variable that he's used before. Here's a couple of his shots:

Both these are unedited and are presented as captured. They are also copyrighted so don't try to copy them.

The conversation that was going on behind me between the pitchers older brother and my grandson consisted of how well the pitcher was doing. That and the fact that the older brother had taught the brother on the mound how to throw various pitches. The dad said, "No, he ain't throwing none those, he's just throwing it." Will take a look at the second shot here and see if this boy wasn't thinking about what he was throwing.

Sunday, June 21, 2009

Shooting in the rain

Last winter I was asked to photograph a local parade. It was raining hard and I didn't have one of those rain hoods you could get at the camera store. It was a Veterans Day parade at Fort Vancouver in Vancouver, Washington. The person who asked me to do the shoot said if I got any good images they would "give me credit" for any images I let them have. That's another story so I won't spend a lot of time on it now. I didn't get credit and they didn't get any pictures. Anyway, I had to figure out a way to shoot the images I wanted and keep my camera and lens from being drenched. Click here if you would like to see my work from Fort Vancouver, Wa. http://DwainsPicks.imagekind.com/FortVancouver

One of the tips I picked up somewhere in the past covered this topic so I was prepared. The tip was to keep a few plastic bags in your camera bag. The ones from the rolls of bags in the vegetable department of your local grocery store are perfect. Next time you go shopping pick up a couple of them or clean and thoroughly dry the ones you use when you buy your veggies. The other thing you need is a good rubber band.

To use the bag, just put your camera inside so the lens with it's lens hood will be outside the bag opening. Use the rubber band to hold it in place by putting it around the lens and over the bag either on or just behind the lens hood. Use a large enough bag to allow you to extend your lens and make manual adjustments if necessary. You can then tear or cut another opening in the bottom of the bag to allow your hands access if you wish. This can be important if you are using a tripod. I also make one more hole for the viewfinder eyepiece. I make this as a tiny slit and then I stretch the plastic over the viewfinder flange. Then I put the rubber eyepiece cap on to hold the plastic in place. You need to be careful that you don't pull too hard on the plastic bag somehow causing the eyepiece cover to pop off and become lost.

I also keep a large clear garbage bag in my bag. I can use it to cover my camera and tripod in a hurry if a sudden wet spell pops up and I don't have time to put my smaller bags on. One other handy item is a small umbrella. I've seen these recently in camera catalogs and being advertised in magazines. and so on. I've been using one for a pile of years and didn't pay what they are asking. I use the ones from Wal-Mart that can be attached to a camp chair. I attach mine to my tripod in the same way. Mine is a tan color which is hard to find. Most of the ones they have now are blue or red. I use my umbrella more for shade than rain but it works in either case. Don't use it when it's windy though. It can cause camera shake and even act like a sail and tip your tripod over, camera and all.

You should also protect your cameras and lenses from dust and the plastic bag trick will work here too.

You should experiment with using the plastic bags in dry weather. Remember that the bag is going to be wet in wet weather and can transfer water to the camera on it's own of you're not careful. There are also other ways to put the bag on the camera that are effective. Shooting through the plastic can give you an artistic effect and you can also use the bag for an interesting framing effect. What ever you do with it, you should always keep one handy.

Friday, June 19, 2009

Old Photo Magazines

I had a pile of old photo magazines that I didn't want to get rid of. They contained "how-to" articles and other information that I just didn't want to part with. The problem was that the pile of magazines kept growing. When you live full time in an RV that is a real problem since space is so limited. I used to keep one of those tiny little three ring notebooks around for my photography notes. I would paraphrase my favorite articles and authors in the little notebook and keep it in my camera bag. That way if I needed to look up a subject for a scene that Iwas working on I had it with me. Pretty soon I needed two notebooks! You can see where this is going right? A problem with the little notebooks was that I couldn't keep the pictures associated with the articles, and their were so many that I wanted to keep. (fooled ya huh!) Well, space and weight have now become a problem there too.

My latest solution was to tear the articles out of the magazines that I wished to keep, then punch them for a full size three ring binder. This was great since I could keep several years worth of articles handy in a single binder. Well I'm now on my second binder of articles and once again space is becoming an issue.

I'm not sure what my next solution to information hording will be. Most likely I'll be scanning and storing the articles on one of those little flash drives. I think I'll experiment with storing it on camera cards for my camera in a format that I can view like when I'm reviewing images.

Wednesday, June 10, 2009

Give a kid a camera!

Need new inspiration? Give a kid a camera and see what you can learn from them.

These photos were created yesterday by my oldest Grandson, age 13, using an old D70 of mine. I put a Sigma 70-300 macro lens on it and showed him how it worked. The compositions are all his with no help from me.


The next two compositions are by the same photographer as in the previous blog. I gave him the choice of using my other D70 but he chose his own little point and shoot Olympus. A 2 megapixel hand-me-down that he likes.

Photography with my Grandson

My grandson came over to spend the night a couple of days ago. I took the opportunity to do a little photography with him. We took each others pictures and shots of other things too. At one point he told me that he wanted to take a picture of the tree we were near. I did not coach him on this or any of his other pictures. I always discuss them with him afterword though. Of the three pictures below, two of them are his. Only one of mine was good enough this time.

Photo's by my Grandson, age 10.


This image pretty much says it all for me.

Monday, June 8, 2009

Photography?


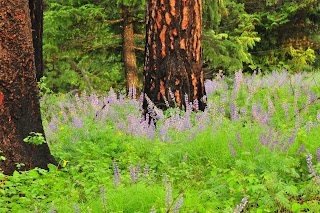
The Spring wildflowers are out in profusion now. I was able to capture a few good images yesterday morning as the sun was rising. It had rained hard overnight though and many of the smaller flowers had been pounded pretty hard and weren't looking very happy. They will come back but at the time I was there they didn't make good subjects.

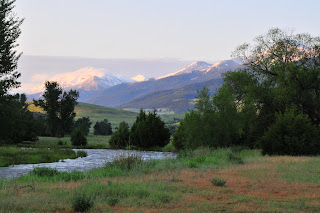
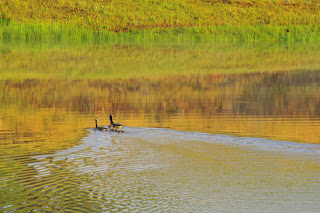
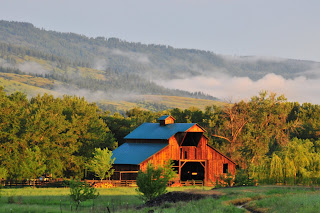
I caught myself making a common error during my shooting spree, and it's one that can be mostly attributed to having not been out shooting in awhile. Right at sunrise I had been shooting pictures of a mountain scene. I had a beautiful river with an "S" curve in the foreground, trees framing the right and left edges, and a beautiful view of high mountains with new snow on their peaks. Ridge top winds were causing clouds at the tops of the peaks to flow off to the right, and the sun was just beginning to bath the mountainside with light. As I worked the shot with different views, frame compositions, and so on I needed to turn off my auto focus and do that manually for a little while. I soon lost my light and my inspiration for this scene and decided to move on. As I drove my truck to my new locations the sun continued to bath new scenes with morning light and captured pictures of barns, cattle, geese on a pond and so on. By the time I got to the geese on the pond, I noticed that I was having problems with focus again and tried to adjust the viewfinder focus dial thinking my eyes were the problem. Later on as I was traveling to where I wanted to shoot the wildflower scenes I stopped at another old barn that was swimming in light. I set up my tripod and prepared to shoot, but I discovered that at the closer range I was now, I couldn't focus the image. It was then that I realized that I had turned off the auto focus.

Fortunately the earlier scenes were at considerable distance. I had set the focus at near infinity and was using a small aperture for greater depth of field. So while my shots were not as clear as they could have been, they were not all that bad.

I captured images of lupines, balsamroot, paintbrush, grouse, wild turkey's,deer and another landscape scene that would take you back to another place and time, and make you wish you could have been there. What really made the experience memorable for me, was that I was simply there. The birds were singing their morning songs, the sun was rising in clear fresh air, and I was the only one there. I carry a small digital voice recorder in my camera bag and I took it out and recorded the sounds of the birds for a little while.

There is more to photography than shooting pictures!

DV

Friday, June 5, 2009

How to photograph a flower

I can't cover all the aspects of this topic in depth since there is so much variety in all the camera's people use and so on but I will discuss as much as is practicle.

This is the time of year for flower pictures. You see images of roses with dew drops on them, and all kinds of other blooms in gardens and yards everywhere. But how do you get your own images to look like the ones in the magazines?

To do this you need to understand (among other things) depth of field. Not all cameras will let you have control over this, but you need to know how it works anyway. Depth of field is controlled by the aperture of your lens and the distance to your subject. Aperture is the size of the opening that lets light into your camera. It is a mathematical ratio of the area of the opening. You don't need to worry about that, I only mentioned it so you would know. Aperture is expressed in terms called "stops" like "f/8," or "f/22" and so on. Now here's the important part and don't try to figure out why this works, just take my word for it OK! With all cameras and lenses, the bigger the opening in the lens, the shallower the depth of field, and the reverse is true as well. So the smaller the opening, the longer or deeper the depth of field. Here's a little twist about this, the smaller f-stop numbers refer to larger openings. The larger the f-stop number the smaller the opening. As I said don't try to figure it out, just take my word for it.

Now I said there is a lot to know about this so I'm going to add one more tid bit here for you to consider too. That is that the depth of field is also affected by the distance to the subject. If you set your cameras exposure and lock it in place then focus on something close you will have a shallower or shorter depth of field than if you focus on something farther away.

Okay, so how does all of this relate to shooting a flower? Well, in most instances you want as much of the flower in focus as possible. To do that you need an adequate depth of field. For those with SLR cameras you can set your aperture to it's highest setting such as f/28 or whatever and fire away. If you don't have control over aperture though you need to control the distance you are from the subject. Remember, the closer you are the shallower the depth of field. I have a little rule of thumb for new SLR owners that seems to help them understand how to use the F stops but it doesn't really explain what it is. Generally speaking, the higher the number, IE f/32 or f/64 the deeper the depth of field. Go to a smaller number such as f/2 and you have a shorter depth of field.

There are two other points I need to mention here. The first is composition and the second is where do you focus? With composition, you should always try to fill your frame. Closer and larger us usually always better when shooting flowers. When focusing, if you have control over this, you should always begin by focusing on the part of the flower that is closest to the camera. Experiment with other parts of the flower as well but start there first.

DV

Thursday, June 4, 2009

What is a Monopod?

A monopod is a one legged camera support that is designed to be used when you will be moving your shooting position often or you have very little space to set up in. This can be when you are in a crowd such as at a parade, or like you see at sporting events when a bunch of photographers are forced together in a small space. As with tripods, monopods come in all levels of quality and features.

When using a monopod, you become the missing parts of a tripod yourself. It should be longer than you are tall and should not be simply stood with the leg perpendicular to the ground. Instead it should extend out in front of you as a tripod leg would. You need to lean in to it a little and stand with your feet apart in a comfortable but sturdy position.

Some features to consider when buying a monopod include, but are not limited to, it's length, weight, and how easily and quickly it can be extended. Another important feature is whether you screw it to the tripod hole directly or that it has a head with a quick release base such as tripods use. This is really the best way to go and you can get monopods that use the same bases as tripods to if you look for them.

Of course monopods have their place in the photographers tool kit like everything else, and they have their avid fans too. Personally I prefer to always have my one of my tripods with me. If I want to use it as a monopod I simply extend only one leg. That way I still have my tripod available for those times when a monopod can't do the job.

Saturday, May 30, 2009

Using your camera's shutter

Knowing how to use your camera's shutter button can effect the quality of your photos. On most, if not all of today's cameras, the shutter button is an important multi-function tool. Knowing how it works and using it properly can help improve your images.

Pressing the shutter button halfway or part way down usually activates the camera's light meter and focus mechanism. Holding the button in that position will lock the focus and exposure settings in place. You can then move or recompose your image in your frame based on those camera readings to improve your images. I will explain more about this in later posts as this is a very important tool for point and shoot cameras where you may not be able to manually set your exposure settings.

Once you have allowed your camera to calculate it's focus and exposure settings, and you have composed the shot you wish to take, you can press the shutter button the rest of the way down to activate the shutter and capture your image. How you do this can affect your pictures too.
If you press the button too hard or jerk the button, it will move the camera as you shoot and cause the images to be fuzzy. In some instances you may want to do this to create a certain effect but in normal photography any movement of the camera is to be avoided. You need to press the button down gently and smoothly to get the best image possible.

One of the most common errors everyone makes, including professionals from time to time, is to just press the shutter all the way down without hesitating an instant at halfway point to allow the camera to focus. Most of the time it takes less than a second for the camera to focus and set the exposure for the shot. But the common result is a blurry image that you can't use.

You should read your camera manual about all the functions your cameras shutter button does then practice using it to see how these functions work. You will be amazed how how much better your images can be if you know how your shutter button really works.

Thursday, May 28, 2009

My Photography Blog

Hi,

You are invited to check out my website at: www.dwainspix.com in addition to this blog. You are also welcome and encouraged to add you own comments about either my website or whatever else is on your mind. I just ask that you keep it positive and clean as my grandchildren and other family members will be viewing your comments too.

At www.dwainspix.com you can view and purchase prints of my digital images in various sizes and forms. It will also be the place where I discuss my latest projects and offer tips and suggestions about how to improve your own photography. I hope you find the site informative and useful. Keep and eye on this site as I intend for it to grow in the future.

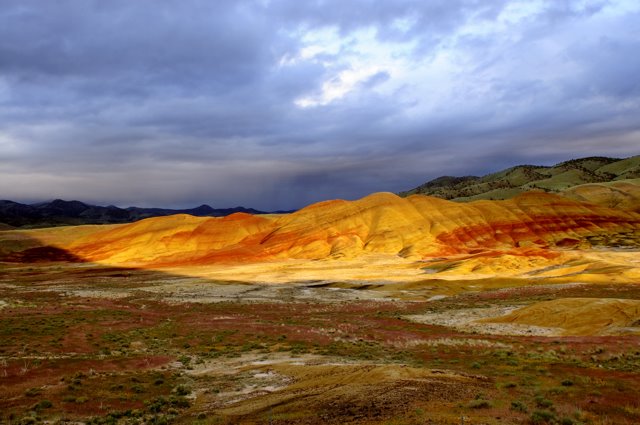
The picture in the Header was the result of a pile of luck and about 7 hours of patient waiting and watching over a two day period. The clouds finally parted at the very end of my final day at the Painted Hills of the John Day Fossil Beds National Monument. A single beam of sunlight made it through to light only the hills and lasted a total of one and a half minutes. This was one of the first landscapes I captured with my new Nikon D300 and I was very lucky to get the chance. There were no other photographers there at the time as they had all left about an hour earlier. I had been watching the clouds and it looked like the one tiny opening in them just might align itself jusf as the sun hit the horizon. It did!

Photography Tips

Here are a few things you can do to improve your photography that will apply regardless of what camera you use. These are the basics that every photographer should know and do to get reasonably good pictures out of any camera.

Make sure you have a clean lens. Don't just blow the dust off, but use a clean cloth suitable for cleaning lenses and do it right.

Set up so your camera is stable and won't move as you press the shutter. You can do this a number of ways. If you will be handholding the camera, hold your elbows in against your sides, and stand with your feet apart with one slightly forward of the other. You can also lean against a solid object like a light pole, tree, building or whatever. The best method though is to use a tripod or monopod. I have both but I like to carry the tripod best. If I want to use it as a monopod I just extend only one leg and us it as I would a monopod. I'll add instructions about to how to use these tools later.

Finally the "First" basic thing you need to do is read your manual and learn what all the parts of your camera are for and how to use them. If you understand how your meter works and what white balence is you'll go a long way to getting that shot you want when the light is wierd and you are wondering why your pictures are all dark or yellow instead of like what you saw on the monitor or in the viewfinder.

I'll expand on all these topics in the coming weeks and months so you'll want to check back and see what I've added from time to time.