Showing posts with label camera. Show all posts

Saturday, October 16, 2010

How To Use Your Camera - Built In Light Meter, what it does

Something you should know as you continue to learn how to use your camera, is what your built in light meter really does. These are really remarkable tools these days but you still need to be aware of their limitations.

Back in the early days of light meters, scientists determined that of all the light provided by the sun, only an average of about 18% of that light was reflected from any surface. Photographers refer to the tone of this reflected light as 18% gray. Ansel Adams took this concept much further but for me to go deeper into this here would take many pages that I am sure you don't want to read just now. So for now, just accept that something near 18% of available light is actually reflected back to your eye, and to your camera.

Because of this, most but not all built light meters are designed to calculate apertures and shutter speeds for your automatic exposures based on an average light reading of 18% gray. Some camera manufacturers have determined to use a slightly different value but for all practical purposes the idea is the same. You can see this in your photos. Have you ever taken a shot of a bright object such as a snow or beach scene only to find your image looking gray rather than white? You can try this if you want by setting your camera to auto everything and shooting a picture of a piece of white paper or some other bright object.

This is why your point and shoot camera may have special scene modes for things like portraits, beach, snow, landscapes, and so on. The manufacturer has decided to help you properly adjust your exposures by attempting to provide clues as to the kind of light scene you might be shooting in. If your camera doesn't have these features, you can still make corrections if it has an exposure lock feature.

In this instance you move your camera as close as possible to the subject you are trying to photograph, letting the meter read light directly from the subject, activate your exposure lock and then recompose your photograph and shoot.

Digital SLR users have more control over this, as do many of the more elaborate (expensive) point and shoot cameras. Continue learning how to use your camera by spending some time experimenting with this. Adjust your scene modes and white balance settings until you feel comfortable with the results and where to find the menu options. You will find that your photos will not be as dark and gray, but the colors will be richer and more true to what you actually see with your eye.

Please send comments if this article was helpful to you or if you would like information about other topics.

If you are looking for books about how to use your camera click this Book Store link to see what is available. Need a Camera? This Camera Store has the the best choices available on the internet.

You can also visit my own photography website at Dwains Picks to see some of my work.

Thanks for visiting and I hope you will check this site often.
Monday, September 20, 2010

How To Use Your Camera - Which Camera should I Have?

Many of the folks I talk to are afraid to admit that they only have a tiny little point and shoot camera. They also feel a little embarassed about the fact that they don't know much about how to use it, and that's why they don't buy a bigger and "better" camera. I once overheard a customer in a camera store tell the clerk that he wanted something that would take better pictures than just a little point and shoot pocket camera. Naturally the clerk was willing to sell him whatever he could. But what the customer really needed to know was how to use what he already had. Once he mastered that, he would then know what features he would need in a new camera, if he needed any at all.

I am here to say that what you need to do is learn to use the camera you have now. You don't need to go out and buy a fancy new camera to learn about photography. The one you have now will get you started and you will be totally surprised at what you can do with it if you spend the time to learn how to use it. Go back and review my previous blogs and apply what you learn to your existing camera. You will be glad you did. Once you have mastered all the features of your existing camera you will be ready to move on to the next level. You may find that you are already there!

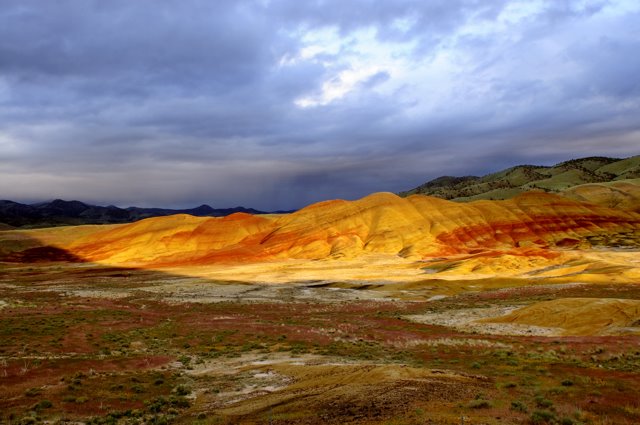
Here's an example of a photo I shot with a 2 megapixal point and shoot Fujifilm camera seven years ago. I proves the point that it isn't always the tool, it's how and when you use it.

IFor more information about photography go to "How To Use Your Camera" for a really cool collection of books and cheatsheets.

You can also see examples of my own albums at Dwains Picks.

Friday, February 12, 2010

Which Camera Bag

Which camera bag should you use? There are four camera bags in this shot. A little white bag for the Kodak EasyShare V1253 that I took this picture with, and three others of various sizes and capacities.

The little white bag is fine for one little camera and an extra battery and memory card two. Toss in a pocket and get out there.

My favorite bag is a LowPro Slingshot. Bottom right. This bag has a single shoulder strap that goes over the right shoulder. It allows the bag to be carried on the back most of the time but swung around the front when needed. The bag is large enough for all the lenses I normally use plus most of the extras I might need for short trips away from my vehicle. I does not have a place for my big 500mm sigma, and there is no place for water bottles and granola bars.

The small bag at the lower left contains my back up Nikon D-70. It has everything for that camera handy and ready to go. I let my grandsons use this bag and camera when we go shooting together. I also keep this camera handy as it has the infrared remote capability that my larger D-300 does not have. I use this when I want to set my camera in a remote site to capture birds but I don't what to be too close myself. I can use the remote to activate the shutter from a distance. I have been successful with this beyond 100 feet.

The big LowPro at the top is my workhorse bag. When completely outfitted, I can be out all day and night in any weather. It has room for all my lenses, an extra camera body, filters, batteries, water bottles, granola bars, gps, mini digital recorder, notebooks, pens, and just about anything else you might want to carry along. I've even carried a little scout mess kit and tiny coleman stove and fuel cell.

I've just completed equipping this bag for long days in the desert where I am now. The weather has been rainy but that's about to end. This bag will allow me to carry enough water for a days photography so long as I go slow and don't over work physically. I can take my extreme wide angle lens, my macro lens, and my big 500mm telephoto. This will allow me to work landscapes, desert flowers, cactus plants, and any wildlife that I encounter.

What am I doing here? I need to get going!

Happy shooting!

Friday, June 19, 2009

Old Photo Magazines

I had a pile of old photo magazines that I didn't want to get rid of. They contained "how-to" articles and other information that I just didn't want to part with. The problem was that the pile of magazines kept growing. When you live full time in an RV that is a real problem since space is so limited. I used to keep one of those tiny little three ring notebooks around for my photography notes. I would paraphrase my favorite articles and authors in the little notebook and keep it in my camera bag. That way if I needed to look up a subject for a scene that Iwas working on I had it with me. Pretty soon I needed two notebooks! You can see where this is going right? A problem with the little notebooks was that I couldn't keep the pictures associated with the articles, and their were so many that I wanted to keep. (fooled ya huh!) Well, space and weight have now become a problem there too.

My latest solution was to tear the articles out of the magazines that I wished to keep, then punch them for a full size three ring binder. This was great since I could keep several years worth of articles handy in a single binder. Well I'm now on my second binder of articles and once again space is becoming an issue.

I'm not sure what my next solution to information hording will be. Most likely I'll be scanning and storing the articles on one of those little flash drives. I think I'll experiment with storing it on camera cards for my camera in a format that I can view like when I'm reviewing images.

Wednesday, June 10, 2009

Give a kid a camera!

Need new inspiration? Give a kid a camera and see what you can learn from them.

These photos were created yesterday by my oldest Grandson, age 13, using an old D70 of mine. I put a Sigma 70-300 macro lens on it and showed him how it worked. The compositions are all his with no help from me.


The next two compositions are by the same photographer as in the previous blog. I gave him the choice of using my other D70 but he chose his own little point and shoot Olympus. A 2 megapixel hand-me-down that he likes.

Saturday, May 30, 2009

Using your camera's shutter

Knowing how to use your camera's shutter button can effect the quality of your photos. On most, if not all of today's cameras, the shutter button is an important multi-function tool. Knowing how it works and using it properly can help improve your images.

Pressing the shutter button halfway or part way down usually activates the camera's light meter and focus mechanism. Holding the button in that position will lock the focus and exposure settings in place. You can then move or recompose your image in your frame based on those camera readings to improve your images. I will explain more about this in later posts as this is a very important tool for point and shoot cameras where you may not be able to manually set your exposure settings.

Once you have allowed your camera to calculate it's focus and exposure settings, and you have composed the shot you wish to take, you can press the shutter button the rest of the way down to activate the shutter and capture your image. How you do this can affect your pictures too.
If you press the button too hard or jerk the button, it will move the camera as you shoot and cause the images to be fuzzy. In some instances you may want to do this to create a certain effect but in normal photography any movement of the camera is to be avoided. You need to press the button down gently and smoothly to get the best image possible.

One of the most common errors everyone makes, including professionals from time to time, is to just press the shutter all the way down without hesitating an instant at halfway point to allow the camera to focus. Most of the time it takes less than a second for the camera to focus and set the exposure for the shot. But the common result is a blurry image that you can't use.

You should read your camera manual about all the functions your cameras shutter button does then practice using it to see how these functions work. You will be amazed how how much better your images can be if you know how your shutter button really works.

Photography Tips

Here are a few things you can do to improve your photography that will apply regardless of what camera you use. These are the basics that every photographer should know and do to get reasonably good pictures out of any camera.

Make sure you have a clean lens. Don't just blow the dust off, but use a clean cloth suitable for cleaning lenses and do it right.

Set up so your camera is stable and won't move as you press the shutter. You can do this a number of ways. If you will be handholding the camera, hold your elbows in against your sides, and stand with your feet apart with one slightly forward of the other. You can also lean against a solid object like a light pole, tree, building or whatever. The best method though is to use a tripod or monopod. I have both but I like to carry the tripod best. If I want to use it as a monopod I just extend only one leg and us it as I would a monopod. I'll add instructions about to how to use these tools later.

Finally the "First" basic thing you need to do is read your manual and learn what all the parts of your camera are for and how to use them. If you understand how your meter works and what white balence is you'll go a long way to getting that shot you want when the light is wierd and you are wondering why your pictures are all dark or yellow instead of like what you saw on the monitor or in the viewfinder.

I'll expand on all these topics in the coming weeks and months so you'll want to check back and see what I've added from time to time.