Monday, February 28, 2011

How To Use Your Camera - Selling Your Work

I just had a real eye opener that helped wise me up a bit.

I have an account at an online photo store called "Imagekind.com" I've had the account going on three years and have paid them the premium price of $94.99US per year. If you look at any of my posts in the past couple of years you will see that I reference that site a lot in an attempt to advertise and sell images. So far I've sold one greeting card for 60 cents and one print for $24.99. I checked my accounts at imagekind and at paypal to see if I ever received any money. Well none seems to have made it my way.

In looking at the policy at Imagekind I learned that they won't send any money unless I earn more than $50.00 dollars. After considering this I decided I had a few options to consider. Yes they are the same ones you are thinking about too. But since I am still advertising that site in so many ways, I decided not to close it just yet. I will at the end of this year however. Instead I simply raised the prices on every image in my store by $50 bucks. It's the only way to insure I will be paid. It probably also insures that I will never sell another product from that site. Never-the-less, there is a better option now.

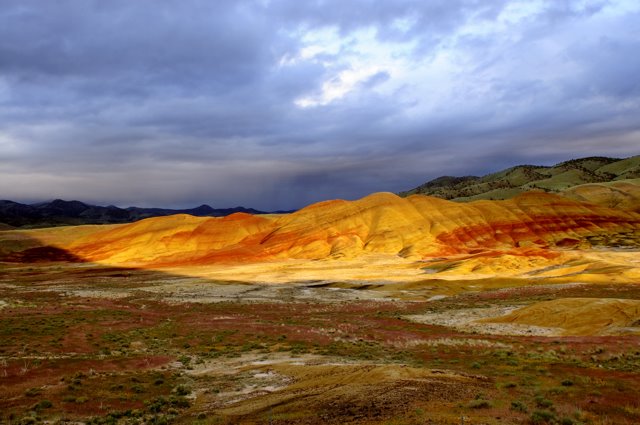
I still encourage you to go to my website at "http://dwainspicks.imagekind.com" to see my images. I have great pictures there and if you want you can buy them as plain prints or framed and matted. There is a better option however. If you find one of my photos that you would like to have, send me an email at  vermilyea.dwain@gmail.com and tell me which print and what size you want. I will ask you what media you want your print on and tell you what it will cost to print and ship. If you have a paypal account all you have to do is send your payment to my email address from your account and I will personally print, package and ship a signed print directly to you. If you don't like the product you can return it to me and I will refund your account, less shipping costs.

I can print up to 13x19 inches on my own professional printer. A company I work with in Portland, Oregon handles my prints that are over that size all the way up to wall sizes for your home or business. I also make my own greeting cards, and will make them from any photo in my galleries.


Tuesday, January 11, 2011

How To Use Your Camera - HDR Photography, What It Is!

HDR or HDRI photoraphy has been around for awhile now but not all of us really know what it is. "HDRI" or "High Definition Resolution Imagry" is simply using specially designed software to combine several images of the same subject into a single image. The effects can be very pleasing. The process can be simple or very detailed and complicated, depending on your individual taste and abilty. Read on to find out how you can do this with any camera for free.

The images used for HDR photography are usually created with your camera by shooting (bracketing) multiple images of the same scene at different exposure levels. This is a good reason for having the best tripod you can afford since the camera should not move during the shooting process.

Some cameras have built in programs that allow what is called "Bracketing." Photographers have been bracketing their photos for many years because it is not uncommon to find yourself shooting in very difficult lighting situations. Photographers will set their cameras to shoot at the meter reading, then shoot additional shots at exposures both above and below the camera's suggested exposure level to help them get the right exposure. Each shot is adjusted by anywhere from .3 to .5 to .7 to 1 full stop and out to a total of at least two full stops above and below the average meter reading. My little kodak point and shoot has the possibilty of shooting 13 different exposures by simply changing it's exposure setting before each shot. My Nikon D300 can do many more and it can be set to do it automatically. The Kodak must be set manually before each shot. The point is that we can bracket our photos with just about any camera so long as we can adjust the exposure settings for each shot. When combining all these photos for a single HDR image, the more exposures you have the better.

After creating your bracketed images for combining into HDR photos, you need to have the proper software. Both commercial and free versions are available. Photoshop, HDRshop, and Photomatic, are a few of the more popular commercial versions. Photonaut, and Luminance are a couple of free versions and are excellent places to get started.

Luminance is probably the easiest version to get started with and a simple internet search will help you find it. I found it by searching for "free hdr software" and checking out all the google suggestions and blog posts about this kind of software. There are tutorials available all over the internet and in You Tube to help you too. So good luck and happy shooting.


Please send comments if this article was helpful to you or if you would like information about other topics.

I have created a great little book store called "How To Use Your Camera" where you can buy photography books online. Just click the link to see what is available.

If you need a camera get it here at my camer store at "Photo To Go"

You can also visit my own photography website at Dwains Picks to see some of my work.

Thanks for visiting and I hope you will check this site often.


Photography Tips

Here are a few things you can do to improve your photography that will apply regardless of what camera you use. These are the basics that every photographer should know and do to get reasonably good pictures out of any camera.

Make sure you have a clean lens. Don't just blow the dust off, but use a clean cloth suitable for cleaning lenses and do it right.

Set up so your camera is stable and won't move as you press the shutter. You can do this a number of ways. If you will be handholding the camera, hold your elbows in against your sides, and stand with your feet apart with one slightly forward of the other. You can also lean against a solid object like a light pole, tree, building or whatever. The best method though is to use a tripod or monopod. I have both but I like to carry the tripod best. If I want to use it as a monopod I just extend only one leg and us it as I would a monopod. I'll add instructions about to how to use these tools later.

Finally the "First" basic thing you need to do is read your manual and learn what all the parts of your camera are for and how to use them. If you understand how your meter works and what white balence is you'll go a long way to getting that shot you want when the light is wierd and you are wondering why your pictures are all dark or yellow instead of like what you saw on the monitor or in the viewfinder.

I'll expand on all these topics in the coming weeks and months so you'll want to check back and see what I've added from time to time.