Showing posts with label Nikon. Show all posts

Wednesday, September 22, 2010

How To Use Your Camera - "P" or Programmed Mode

A large number of your camera's will have a "P" posted on the Mode Dial. This is a really cool setting and is one that you will really want to know how to use as you learn how to use your camera.
When you select this setting, your camera is basically on full automatic everything. But you have the option of changing the automatic selections your camera chooses if you want to. Lets say you are shooting a nice water fall while the camera is in P mode and because it is a very bright day all your shots are freezing the action and you really want that silky effect. You can get this by adjusting the shutter to a slower speed. (this is usually the default adjustment) In program mode the camera will automatically change the other settings so that you maintain the correct exposure all the time. Because changing the shutter speed also causes the aperture to change, you can adjust the shutter to get the aperture you want as well and have control over depth of field.
I normally use the P setting when I am shooting unpredictable subjects and I think will need to react very quickly. These subjects can be kids at a baseball game, flying birds or running wildlife, or any moving subject such as ocean waves, water falls, and so on. I keep my camera on continuous auto focus and use a setting that lets the shutter continue to work as long as I hold the button down. Then all I need to worry about is zooming in or out to get the shot I want. Yet I still have the option of adjusting the settings if I think I need to and I don't have to take the camera from my eye to look for another option.
If you liked this article or if you would like to see information about another subject regarding how to use your camera please send me your comments.

Another great resource for information about learning how to use your camera is my online store at "How To Use Your Camera"
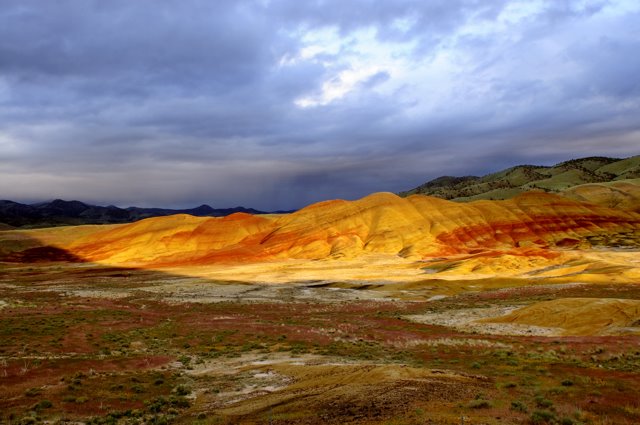
To see my photos go to my website at: Dwains's Picks

Monday, September 20, 2010

How To Use Your Camera - Shutter Priority or Time Value settings

Different camera makers call this by different names. Nikon calls it "Shutter Priority,"while Canon calls it "Time Value" and represents it by the symbol Tv on their shooting mode dial. Other cameras will have the same or similar terms that reference the same function.

As you learn how to use your camera, one of the features you will want to gain control over is shutter speed. By setting your camera to the "S" on a Nikon mode dial you will have selected Shutter Priority Mode. When the camera is in this mode you can choose how fast or how slow your shutter will work. At the same time, your camera will calculate what aperture will be appropriate to give you the best exposure based on it's light meter reading and your selected shutter speed. 

The best times to us this option is when you know you want your camera to shoot at a certain speed, but you are unsure about the other exposure elements or you know you won't have time to consider them. This can be when you want to stop action, or possibly add a blur effect to some action. For instance lets say you want to shoot pictures of a waterfall with the water appearing silky. You would use a very slow shutter speed. The camera will open or close the aperture accordingly so you get the best exposure. Another example would be when you want to pan a subject, that is you are watching your son or daughter as they ride past you on their new bike. You focus on their face and using a moderately fast shutter speed you snap the shutter as they go by. The effect will be a clear view of the moving subject, with a blurry background.

I have created collection of books and other resources that will provide in depth detail about these subjects and more, if you are interested you can look at this simple website to find just about everything that is available to help you learn to use your camera. I am particularly fond of the books of Bryon Peterson. He shoots in the same geographic areas that I do and I can relate to his subject matter.

How To Use Your Camera - Books

Dwains Picks

Sunday, September 12, 2010

How to Use Your Camera - The Mode Dial

Many of the cameras I see people using these days have a mode dial on them. These cameras also have a multi-selector dial as well and you should not confuse one with the other. The mode dial is where you select the proper shooting mode for the conditions or type of photography you will be doing. Some of the most common settings available are AUTO (Most people use this setting) landscape, portrait, sports, P or Programmed Auto, S or Shutter Priority (Nikon), Canon calls this Tv or "Time Value." A or Aperture Priority, and M or Manual. I will discuss each of these in subsequent blog posts. Nikon cameras include a "Scene" mode with sub-menus that include shooting fireworks, snow or beach scenes, landscapes, portraits with face recognition and so on.

My Kodak Easyshare 1253 isn't this fancy. It simply has a Scene button on top that lets me choose from 23 possible situations that I might find myself shooting in. I just have to push the button and select the mode that fits the lighting conditions I will be shooting in. It's pretty simple if you know where to look but if you think you will find these options by pushing the menu button you will become frustrated in a very short time. This is another reason to learn how to use your camera.

Spend some time looking for the mode dial or scene buttons on your camera. Once you know where to find them take several pictures using each of the various options. It will be important for you to be able to find these modes quickly and easily. To do that well will take a little practice as you learn how to use your camera.

My next blog post will discuss Depth of Field, which settings will allow you to control it, and why you might want to do that.


<a href= “http://dwainspicks.imagekind.com”>Dwains Picks</a>


Monday, May 3, 2010

Nikon D300, Auto or Manual Settings

Most serious photographers, whether amateur or above take pride in being able to shoot their cameras in totally manual settings. The really good ones know and understand exposure, what the effect of long lenses verses normal verses wide-angle lenses can be and the relationship of focal length to distance and so on. They understand the differences between shooting landscapes, portraits, panoramas, panning and action shots, and which lenses and exposures produce the best results in each instance. These photographers sometimes shudder at the thought using anything that is considered "auto" on their cameras under any condition or circumstance. It's a matter of pride and integrity. They might actually have a feeling of "guilt" if they stooped so low as to "autofocus," especially if one of their peer's found out that they had reduced themselves to letting the camera make any decisions for them at all. "Oh the Shame!"

I look at it differently and thankfully so do millions of other photographers and manufacturers. The reason is this, when we choose the various settings our cameras are capable of, whether auto or manual, we know why we want that setting and what effect it is supposed to produce. We know and understand exposure, but we also understand that sometimes conditions are such that it is humanly impossible for the photographer to track and adjust to all the changing conditions we experience while shooting.

Here is an example:

This weekend I was shooting pictures of my grand son as he and his teammates played a baseball tournament.

I proudly set all the settings on my camera as follows:

1. For White Balance-I used auto because the sun and clouds were rapidly intermittent and I knew I would be watching the game and not the specific lighting.
2. ISO-also auto because late in the day we've been having very dark clouds actually make it so dark that shutter speeds become too slow to stop the action. Letting the camera choose the best ISO setting would help keep shutter speeds up.
3. Quality was set to normal. I don't expect to need RAW data here for large format images that I can't produce with the cameras normal setting. I can also get a lot more images on my cards which is important in this instance since I was shooting multiple shots to capture the action.
4. My auto focus was set to continuous servo, and the dial at "Ch" for continuous shooting at 6 frames/sec. I wanted to capture the action with as many images as possible of the batter or the close plays at the bases or in the field. Compose
5. I took advantage the Nikon D300's 51 auto-focus points with 3D tracking so my images would be as clear as possible during the sometimes very fast action sequences. This way I could swing the camera from batter to outfielder to base runner while adjusting the focal length on my zoom lens to get as much of the action as possible. (This is really hard to do)
6. Next I set my camera to "P" or "Programmed Auto" mode. This allows the camera to set the shutter and aperture based on its meter readings regardless of what focal length I am adjusting to, but will also allow me the latitude of over-riding the auto-setting if I choose to.

I had a few other settings adjusted here and there too such as whether my camera should choose shutter or focus priority or both, and so on. So in the end, was I really doing all the work and totally in charge of my images or was the camera doing all the work and giving me the credit for whatever came out? I like to think I was the one in charge. Yes  I delegated certain aspects to my camera and took advantage of the tools and abilities it provides, but I chose which ones and I knew and understood what they were and why I wanted to use them. Subsequently I also knew what to expect from my effort and I wasn't disappointed.

In the end I have roughly 2000 images from four baseball games over two days of shooting to evaluate. No, not all of them will be great or even good images, but there will be a few that are and these will be better than the average shooter could have gotten. In many instances they will be better than the hard core manual shooter could have gotten as well simply because the action is too fast. When shooting at manual settings you need to set your camera for averages and a lot of time that is just what you get, average images.

So, whatever camera you use, learn about all of it's abilities and take advantage of them. You will be surprised and pleased with the results.

Sunday, January 10, 2010

Foggy Photography

Yesterday was a tough (but wonderful) day for shooting on the Oregon Coast. It was incredibly foggy and even when the fog lifted, a heavy, misty haze kept the atmosphere very gray.

I was out shooting with my young friend near Shore Acres and Sunset Bay State Parks. We had the right subjects with huge crashing waves, seagulls, pelicans, snails, trees, rock formations and all but the lighting was hard to deal with. We attempted different shooting modes on our Nikon's such as sepia, or black and white since the lighting caused most of the shots to be near black and white anyway. Suddenly my friend says "I found that when in sepia if I set my white balance to "incandesant" the rocks are darker and stand out better." I tried a few shots like this and liked the result.

This image is as it came from the camera. I didn't edit it at all and I'm not sure what I would do with it if I did. I think I like it as it is

As I always say, don't be afraid to try new things. Use your camera, change its settings and keep shooting.

Tuesday, November 24, 2009

Which Camera ?


Which camera should you choose? Well some folks have only one so that makes it easy. You use what you have. But sometimes we have a choice.

I was recently involved in a very arduous outdoor experience. Taking my big D300 and tripod along with the backpack bag and assorted lenses would have been ideal. But, we were hunting deer and I didn't want to lug all that equipment around while trying to help my grandson fill his tag. I wasn't shooting a film or documentory, but I wanted nice shots to record the event.

One of my backup cameras is a little Kodak EasyShare V1253 point and shoot. It fits in my shirt pocket, takes good close up movies and snapshots, and shoots at 12megapixels. This camera, equipped with a 1gb memory card and a spare battery would be my choice for this trip.

As you can see from the images below, the little Kodak camera has done a great job of capturing our event. The day was very cold and very windy with blowing snow at times. Using the little Kodak in this instance was an advantage over my Nikon D300. A Camera I really like.


The only problem I had with my Kodak was that for some reason it would loose the date and time. Because I didn't have my eye glasses I could not see the menu's to make corrections. This was frustrating and the date stamped on my images is incorrect. I will either crop this or otherwise edit it out on the computer but it's something that should not have happened.

Sunday, September 27, 2009

Sports Photography

I had the opportunity to shoot pictures of my grandson (with the ball) playing football this past Saturday with my Nikon D-300. I used the kit lens that came with it. It's a AF-S DX VR Zoom 18-200mm f/3.5-5.6G IF-ED lens. I use it for most of the action work I do with this camera. I ended up with 1023 totally sharp frames by the time the game ended.

The game was being played in the late morning when the sunlight was very harsh. There were no clouds in the sky to soften it up so the shadows are very deep due the the high contrast. My camera settings were: exposure mode - P, ISO 200, White Balance - Sunny, Quality - medium/basic, continuous focus mode with the release mode set to high. I used "Dynamic Area Auto Focus set to 21 focus points. I didn't want to let the camera have total control of what would be the main subject. Picture control was set to vivid. I also set my camera to focus priority. I usually set my priority focus point in the upper center part of the frame. That way I keep the subjects heads at the top of the frame rather than in the middle and I don't usually cut off their feet or heads.

Because I want my images to all be in focus, the focus priority setting will prevent the camera from firing if it can't get the images in the frame in focus. This can be a bit exasperating when you want a shot and the camera won't work. I've learned that if I keep my focal length between 70mm and 200mm the focus points work well. If I go wider and use something between 18mm and 50mm or so, the camera is not likely to find a focus point and will delay shooting. I sometimes press the AE-L/AF/L button to force the shutter to fire in these instances and when I need the wider shot.

I use a 4GB Sandisk Ultry II CompactFlash card that reads at 15mb/s. It works well and has never failed. At the settings I used on the camera I still had about half of the cards capacity left by the time the game ended.

Sunday, September 6, 2009

Now and Then

Every scene I attempt to capture with my camera has an impact on me. Every now and then one comes along that has a greater impact than others and I have just added one of these to my website and photo store.

I created this image using a feature in my camera that allows me to overlay two images to create a new image of both. You can do this with good film cameras too by exposing your film at different subjects without advancing the frame but you need experience and skill to do this well. You also need a camera that allows this kind of photography. Not all of them do this as they are designed to prevent us from ruining a previous exposure with a new one.

I used my Nikon D300 to create this image and when reviewed this scene on my computer later, I found that I did not want to edit it further. I didn't even crop it to a standard size. I decided to totally leave this image alone. You can find it in a new gallery called "Thoughts" at Dwains Picks

Photography Tips

Here are a few things you can do to improve your photography that will apply regardless of what camera you use. These are the basics that every photographer should know and do to get reasonably good pictures out of any camera.

Make sure you have a clean lens. Don't just blow the dust off, but use a clean cloth suitable for cleaning lenses and do it right.

Set up so your camera is stable and won't move as you press the shutter. You can do this a number of ways. If you will be handholding the camera, hold your elbows in against your sides, and stand with your feet apart with one slightly forward of the other. You can also lean against a solid object like a light pole, tree, building or whatever. The best method though is to use a tripod or monopod. I have both but I like to carry the tripod best. If I want to use it as a monopod I just extend only one leg and us it as I would a monopod. I'll add instructions about to how to use these tools later.

Finally the "First" basic thing you need to do is read your manual and learn what all the parts of your camera are for and how to use them. If you understand how your meter works and what white balence is you'll go a long way to getting that shot you want when the light is wierd and you are wondering why your pictures are all dark or yellow instead of like what you saw on the monitor or in the viewfinder.

I'll expand on all these topics in the coming weeks and months so you'll want to check back and see what I've added from time to time.