Are you trying to get good shots of your kids or grand kids playing baseball? Is the backstop behind home plate causing your camera to focus on it rather then the subject you want?
You can beat this problem if you can control your camera's focal length. To shoot through a fence or the bars of a cage at the zoo, you use a longtelephoto lens. This can be a problem for some shots, but if you want to get the player swinging the bat at home plate, zoom in. The fence will blur out or totally disappear depending on how far you are from the fence and how much telephoto you have. Experiment with this before and during the game to see what you need to do. Once in awhile you will get a perfect shot, of the fence! But you will also get some great shots of your favorite player as well.
Try it! Let me know what happens!
Thursday, April 29, 2010
Monday, April 19, 2010
The Lonely Photographer-Hardly!

I headed for a Bank of America first to get some cash to pay the entry fee, picked up a ready made poorboy complete with chips and a cookie at the local grocery, and set my vehicles GPS for my destination. I've learned that this device will take me over routes I would never think or know to go, and it's always a pleasurable experience. As a matter of fact I have a small Amazon Website where I sell the Top Rated GPS units. There's a link to that site on this blogger page.
When I got to the refuge I had a nice visit with the volunteer in the contact station, paid my entry fee of $3.00 dollars and started out on the Auto tour. You drive your own vehicle over a pre-determined route and do your photography from within your vehicle.
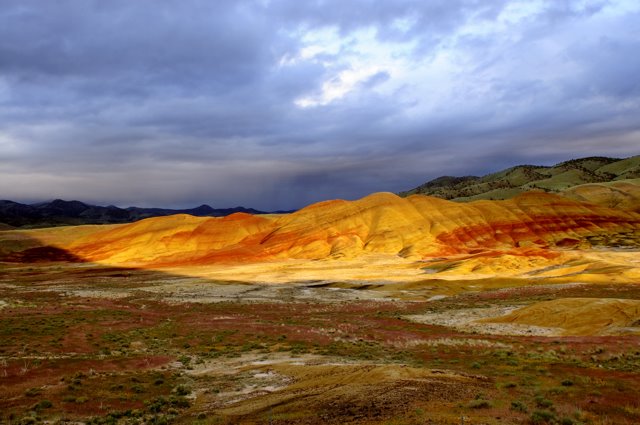
I saw tons of wetland birds. The day was sunny but hazy, making it a little difficult to choose which white balance setting to use. I chose daylight and let it go at that. Still I hadn't totally prepared my camera as I should have and was just enjoying the slow drive as I idled the truck along the route. There were other cars on the tour too and we just passed each other as needed but kept moseying along.


I soon left Richland and headed over to the Cedar Creek Grist Mill. I had been there the day before and after reviewing the shots I took that day I wanted to go back and try to catch the same frames but with different lighting. As it turned out I arrived just in time and the light was exactly as I had hoped. I had time to create about ten frames before it was gone. I worked a few other closeup scenes with Bleeding Heart and other wildflower blooms, and visited with other guests before leaving.
Was I a lonely photographer because my wife and son chose to stay home? Not on your life. I made several new friends, had a great day of photography, and came home grinning and happy with a camera full of nice pictures for my "lonely" effort.

Wednesday, April 14, 2010
Close-Up Photography
 Entering the world of close-up photography for the first time is like being a pioneer. It's challenging, exciting, and offers new wonders at each bend. It requires developing a new "eye" for photography. You're still looking for that perfect landscape, but it's much smaller. It requires learning new ways to use your old equipment, or acquiring new equipment to do the job. I suggest learning to use your existing equipment for close-up work before buying a bunch of new stuff. You will be surprised at what you can do with what you have. Don't be afraid to use your little point and shoots for this work too. Some of these will do amazing things for such little cameras.
I created this image using my Sigma 70-300mmD Lens mounted on my Nikon D300. This lens has a macro feature that lets me focus closer than normal at 200 to 300mm. It doesn't create a true macro image of 1:1 where the subject is the same size on the CCD as in real life, but will allow ratios from about 1:2 to 1:5. I mounted a really really cheap Quantaray 4X close-up filter from my earliest days in photography on the front of the lens and began messing around to see what would happen. I soon spied this little growth of lichen on the end of a fence board and moved my tripod (Bogen-Manfrotto 3221W, with a 30-30 head) up close for the shot. This took some maneuvering but I finally found the range and began shooting. I used the other filters in the set at 1x and at 2x too but I don't like the results they offer at all. The 4x really surprised me though. It gave the image a huge sense of depth. Mostly due to the filters poor quality and the subsequent vignetting that occurred. I really like this shot and its is displayed here un-edited and exactly as it came from the camera. As you probably guessed, I'm off on a new (to me) project again, and you can bet I'll be experimenting more with my old equipment in new ways.
Here's a great book that I bought at Costco a couple of days ago that is helping me with this type of photography: "Understanding Close-up Photography," by Bryan Peterson. There were three other books of his there as well but this one suited my needs at the moment. Besides Bryan does some of his photography in the same places I do here on the West Coast of the US.
Sunday, February 28, 2010
Shoot The Moon
 Want to get good photos of the full moon? Here's how to set up your camera. You will need to ignore your light meter for this so don't worry if all the little bars are telling you that you are underexposed. Any camera that will allow you to gain manual control of the exposure settings can be used for this.
First put your camera on your tripod and hyper-focus on the moon. To do this you need to turn off "autofocus" and manually focus your camera on the moon so that it is clear and you can see the craters and other details, then slightly back it off a tiny bit. Now set your camera shutter speed to 1/500sec, and the F/stop to F/11. This is your starting point. You should also be using your longest lens and set it to it's maximum focal length, then back it off just a bit too. I always use my timer setting to snap the shot. I don't have a remote shutter for my camera and the timer works fine for me.
Remember that the moon is moving and you will need to re-frame your scene from time to time. I've never been successful shooting shots of the moon and hand holding the camera so I strongly recommend that you use a tripod for this.
Now, what if you want to shoot moon scenes that include the landscape? For this you will need to use your meter. I set mine for spot metering. I then put the selected spot on the landscape that I want to be metered properly and adjust the shutter speed and F/stop accordingly. Don't forget to re-focus your camera if you need to. From this point it is a matter of shooting at different focal lengths and exposure settings. I will continue shooting at various settings with the moon in different parts of the frame until my creative juices have been exhausted where upon I will download my images and check out my work.
Note that the moon rises a little later each day. I check a local almanac to find out when. If no almanac is available I try to note when the moon lifted above the horizon then add about twenty minutes for the next day. That will be close enough for you to get ready. You can also get near "full" moon shots the day before and the day after the actual "full moon." Knowing that you should have plenty of time and opportunity to plan your shoot and make any adjustments you find necessary, barring the weather.
Well get out there and have some fun!
Thursday, February 18, 2010
More Copyright Issues
 A few days ago I offered a couple of 4x6 prints to be displayed in the office of the BLM area we are currently staying in. The owl at left is one of those images. I put my name and my website information on the bottom of the print but I neglected to put a (C) copyright statement there too.
Today I was informed that one of the volunteer officials from the office intended to take my print to town and make copies of it. The person telling me about it was all agog about all the comments that had been made over those two images. Such comments about how perfect the lighting was, and that a former Natl. Geographic Photographer ( I can't confirm this but was told that one evaluated the images) had commented as to how good the shots were, and so on.
This is something that I have come to expect from my photography. People see it and tell me how wonderful it is, they will even drive to do town 20 miles away to have copies made to frame and give to their friends. But will they buy them from me? Only if I catch them first and this is rare!
I informed the lady that wanted the copy that I would provide one for her, and not to have copies made since I still hold the copyright. She was OK with that and said she would return my print to the office for display again.
In the future I will be putting copyright statements on my images and will include something that says that it cannot be copied in any form without my express written consent. I will probably go back to that office and write this on these two images in the next couple of days too.
An uncle once made an interesting statement to me as I watched him being repeatedly stung by angry bees as he was stealing wild honey from a hollow tree. He said "it's just totally amazing what a guy will do and endure, to get something for nothing." The same thing applies to your photography. People will steal you blind if they can and never even consider it theft unless you catch them at it.
I'll be doing more on this topic so keep an eye out for additional posts.
Friday, February 12, 2010
Which Camera Bag
 Which camera bag should you use? There are four camera bags in this shot. A little white bag for the Kodak EasyShare V1253 that I took this picture with, and three others of various sizes and capacities.
The little white bag is fine for one little camera and an extra battery and memory card two. Toss in a pocket and get out there.
My favorite bag is a LowPro Slingshot. Bottom right. This bag has a single shoulder strap that goes over the right shoulder. It allows the bag to be carried on the back most of the time but swung around the front when needed. The bag is large enough for all the lenses I normally use plus most of the extras I might need for short trips away from my vehicle. I does not have a place for my big 500mm sigma, and there is no place for water bottles and granola bars.
The small bag at the lower left contains my back up Nikon D-70. It has everything for that camera handy and ready to go. I let my grandsons use this bag and camera when we go shooting together. I also keep this camera handy as it has the infrared remote capability that my larger D-300 does not have. I use this when I want to set my camera in a remote site to capture birds but I don't what to be too close myself. I can use the remote to activate the shutter from a distance. I have been successful with this beyond 100 feet.
The big LowPro at the top is my workhorse bag. When completely outfitted, I can be out all day and night in any weather. It has room for all my lenses, an extra camera body, filters, batteries, water bottles, granola bars, gps, mini digital recorder, notebooks, pens, and just about anything else you might want to carry along. I've even carried a little scout mess kit and tiny coleman stove and fuel cell.
I've just completed equipping this bag for long days in the desert where I am now. The weather has been rainy but that's about to end. This bag will allow me to carry enough water for a days photography so long as I go slow and don't over work physically. I can take my extreme wide angle lens, my macro lens, and my big 500mm telephoto. This will allow me to work landscapes, desert flowers, cactus plants, and any wildlife that I encounter.
What am I doing here? I need to get going!
Happy shooting!
Sunday, February 7, 2010
How To Get Great Pictures
 You need to plan ahead if you want to increase you chances of getting better than average shots. It helps if you know how to frame an image or how to arrange your subjects, but the real key to great photography is planning your shots ahead of time.
I do this by doing reconnaissance trips, with a camera, through the area I intend to come back to. The first time through an area is when everything will be the most interesting to you. Your inspiration will be at it's peak and you will get some of your favorite images now. Use your best camera at its highest quality setting.
Once you have a chance to review you work you can decide and plan how you will do your next photo trip. You should know what subjects you want to work on, where they are located, and when the light will be just right for your work. You will also know how you want to frame your shots, what to include or what to leave out, what depth of field you might want and so on.
As a rule I've learned to take lots of pictures of each subject from different angles, widths, and distances the first time I see it. My inspiration is always highest then and I am usually most creative too. Then, as I review all my images later they will either seem "complete" or they will cause me to look for answers to questions. If I feel that they image is "incomplete" or doesn't finish the "story" I will try to shoot it again and make it right.
The image above is a perfect example of what I am talking about. It is a beautiful desert scene of the Chocolate Mountains in the background and a brilliant Ocotillo plant in the foreground. Depth of field and focus or clarity are all good. Composition is properly arranged and so on but something is missing. For me it's the "foot" of the Ocotillo. It's been cropped off in the camera during the initial shot.
Now I know what I want to work on next time out. I just need to decide when I should be there. I'll let the creative juices that inspire me again at the time, but at least a few shots will include the foot of that Ocotillo plant.
Subscribe to:
Posts (Atom)