Saturday, September 11, 2010

How to use your Camera - Understanding White Balance

One of the most important aspects of how to use your camera includes a basic understanding of whate balance. Almost, if not virtually all digital cameras nowadays have a menu option called "White Balance." Even your digital phone has a setting for white balance if it has a camera in it. So what do we use "white balance for?" Most cameras and phones will have this setting set to Auto. This is okay if you like to let your camera do all the thinking for you. Your camera will read the available light and choose a setting that it thinks will render the color of your images as it sees them. But what if you want the picture to appear differently? How do you make a picture created on a cold and dreary day, look warmer if that is what you want to depict? You can do this by changing the white balance settings.

Here is my suggestion for learning to use this feature of your camera. First read what your camera's manual says about white balance. Most of the manuals will tell you that the camera sees light differently than what the human eye sends to the brain. Your brain automatically adjusts light to be "white" light. It filters out all the different colors and makes it appear white. A camera doesn't have that ability. It reads the light as it is, if it's blue, you image will appear blue,if its red, it will appear red, and so on. The white balance settings in your camera help you gain control over this. Some cameras even let you adjust light by what is called Light Temperature. We won't discuss that here.

To learn to use this feature and how it can help you get the picture you see, or the one that you want to create, change the settings and shoot some pictures in each one. Note the differences and think about new ways to use this feature to create interesting photos.

I do most of my photography out of doors. The three settings I use the most are daylight, cloudy, and shade. The daylight setting is for clear sunny days, and tends to add a bluish tint to my pictures, making them appear more natural as my eye might see them. The cloudy setting adds a little more red to the image to overcome the natural blue tint from the clouds. And the shade setting adds even more red because shady areas tend to be even more blue than the light on cloudy days.

So to continue to learn how to use your camera, read about the white balance settings in your camera manual, then grab your camera, find the white balance settings in the menu and take a few pictures at each setting. Go outside as see how the changes effect your pictures of a flower, and landscape, and a person or pet. Go inside and shoot in the light provided by a light bulb and note the changes here too. You will have a lot of fun with this, and just maybe you will also create some really neat photographs.
Friday, September 10, 2010

How to use your camera – Where to start


So where do you start if you want to learn to use your camera? Well the best place is by getting both the camera and it's manual out together. If you are one of those folks who always say “I just need to take the time and sit down and learn how my camera works,” this is the time.
Before turning the camera on, look at the “Quick Start Guide” that came with your camera. It will tell you things like how to turn it on, insert the batteries, charging time for the batteries and how to shoot pictures. I might include how to hold the camera and how to frame shots as well.
Take a look at the “mode dial” on your camera if it has one. If you don't know what this is, check for it in the manual, and read about all that it does. Most of these will have little picture symbols on them and some version of P, S, A, and M painted or stamped on the surface. It will also have an auto setting as well, and there could be others. The Mode dial is where you will be able to change or set the camera for most of the settings you will want to use. Not all cameras are equipped with mode dials though, Some only have internal menus to work from. Cameras with mode dials also have the same settings in their menus as well.
Take the time to look at all the menu options. Usually there are three basic categories including “Settings or Setup,” a “Shooting” menu, and a “review” menu. Most cameras also have buttons on the outside that speed up certain tasks like image review and delete, video, and other commonly used tools. Experiment with the various settings you find on your camera and in the manual. We'll talk about many of these in later blogs, but for now you need to start becoming familier with both your camera's manual, and the menu options in each categorie available for you particulare make and model of camera.
Next we'll begin working with some of the basic settings like what is ISO, and White Balance, and why they are important.

How to Use Your Camera

Hi,

I am about to launch a series of blog posts about "How to use your camera." The need for this came to me this summer as I was working as a volunteer for Oregon State Parks and Recreation. I worked at Wallowa Lake State Park, where part of my duties included conducting photography walks along some of the hiking trails in the area. Before each walk or hike, I spent a little time explaining some important factors about "creating" photographs rather than "snappin' pitchers." I discussed three things all pros use to make a photo. I included the tools used to make those three things work, and I began helping people get used to using the menus in their cameras as well as explaining what some of the things mean.

After a few outings I came to realize that most folks simply don't understand the language to begin with. Some folks could relate ISO to the old film speed concept they used to use when they bought new rolls of film, but when asked how different settings could effect their images in different lighting conditions they had no clue. Almost everyone became confused when we talked about aperture and depth of field. Shutter speed was a little easier to grasp but almost no one used the shutter speed setting on their camera. Almost everyone I talked to always used the "Auto" settings for everything.

So, if you are one of those folks who wants to know how to use your camera just follow along. I'll begin by discussing the most common features available on most cameras available today. Then I'll dive deeper into the mysteries of these features and tell you how to use them. In the end you will have learned much more about your camera, how the controls work and how to control them, and above all learn to take better pictures. Will you be a Pro by then? Probably not, but you will have a much better understanding of  photography and how to create a photograph the way you want, rather than be surprised at how good your camera works.

DV

Friday, May 7, 2010

The Fox and the Photographer

I had the pleasure of watching and photographing this Red Fox for about an hour before I captured this shot. I had others from other locations and distances and a few more after this one but I think this one best describes the story of his day.

I first spotted him as a bright blond spot on top of a distant rock outcrop. He was hiding from people and their domestic dogs as they passed by on the road under his location. I had seen this fox in the vicinity before so wasn't surprised by his presence. Actually I was looking for him.

As I watched him he was laying down behind some low tufts of grass watching the people and animals below. After they passed he sat up then got up and moved up the hill. After traveling several hundred feet he suddenly came to attention looking straight ahead and down a little, then did the little fox hop and nose dive into the vegetation in front of him. When I next saw him he was chewing something but at the distance he was from me I couldn't tell what it was. I lost track of him then as he moved behind rock outcrops and more vegetation.

In about a half hour I saw him again. He was coming down the hill from far to the right of where I had last seen him. As he got close to this point he stopped once more on the top of a small rock outcrop and laid down behind another clump of grass.  As I waited and wondered about what he was doing, I noticed more people and dogs walking on the road that passes along the base of the hill. I should note that this is a favorite road of dog walkers, walkers, and people who never leave their cars but run their dogs on the road with general abandon. As a hiker in the area I need to keep a constant eye out for their droppings as most of the locals consider this area a dog toilet, and it saves cleaning up their own yards by running their dogs here.
But I digress!

As soon as the walkers passed by the fox got up and started down the hill again. Suddenly he stopped and ran quickly back to the top of the outcrop. He stayed just long enough to let a pickup truck pass by with a border collie streaking down the road in front of it. As soon as they passed the fox quickly trotted to this spot and I captured the image as he stopped to look over the ledge.  From here the fox moved about fifteen feet to his right and laid down as if he were going to go to sleep. Now and then he would suddenly look back up the hill or up the face of the rock outcrop then lay back down. Then suddenly there were two foxes there. The first one didn't rise but held his reclining position and it appeared as though he were regurgitating his last catch and the other fox was re-chewing it. I was over 400 yards away looking through a 500mm lens so couldn't be sure.

The second fox then moved off down the hill and I lost track of it in the rock slide. I presume it was the first foxes mate and she returned to her den. Her color was much darker with less winter coat than his. The original fox resumed his nap and was still there when I left the area 30 or 40 minutes later.

Thursday, May 6, 2010

Foxes

The weather finally broke a little bit and I was able to get out and shoot a few pictures this morning. It was cloudy and the wind had a nasty bite but at least it wasn't snowing or raining.

My objective was to attempt to photograph a Red Fox that has been seen recently near where we are staying. I didn't know for sure if I would be successful with this and had a back up plan of photographing the fox's food. Golden Marmots live on the same hillside as the Fox and in great profusion.  These can be interesting and challenging too. You can hear them chirping before you will ever see them. This fox is well known by the community and we all look forward to seeing it and it's kit's in the Spring.

A long range lens is very helpful in this kind of work photography and I have a Sigma 170-500 that I use. It's not top of the line but it does a good job in good light. This is the lens I would use for this project.

During a two or three hour I was able to capture a few scenes of snow capped mountains, marmots, two foxes, and a barn owl. The owl shots didn't turn out with this lens as it was flying and I was on a tripod set up for sleeping foxes when it came by.

I didn't get any really great shots of anything but that's not the point. The point is that I was able to get out there and get something. It was a good day!

Tuesday, May 4, 2010

Kids and Photography

I do a lot of photography with my grandkids. Enough that I can trust them with my camera. Of course I keep an eye on things but at age 14 a boy or girl can be responsible for things if you expect them to. You just need to teach them some basics and be able to step back and let their imaginations go to work.
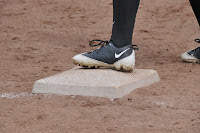
This past weekend I handed my camera to one of my grandsons charging him with shooting his brothers baseball game. I had captured two games the day before and thought he would like to do this one. I had the camera set up so all he had to do was frame his shots, something he thinks about and is good at.
The result of letting him shoot that game is phenomenal. Not every picture is perfect as you might guess, but the story told by the series of images he shot is amazing. All totaled he shot 1191 pictures. Mostly of the ball game, but there are other things there too.
It has pictures of me from across the field, he also has pictures of a very pretty girl from across that field too, and later there are more of her from a little closer. I'll talk to him about that! Not that he shouldn't take pictures of girls but how and why and the ethics of doing it. The thing is that he shot and captured what he saw through his lens. Family members and friends all became part of the story. In the end what he captured was the essence of a weekend of baseball with family and friends. It couldn't be done in one or two simple photos no matter how perfect they could be, instead it took over 1000 images to make the story whole. We can edit this down to fewer images and we will, but it will be the photographer, my grandson, and I doing it together and he will have the final say as to what we use in his story. I just might make a coffee table book out of this collection or maybe a screen saver. Isn't photography fun!

Monday, May 3, 2010

Nikon D300, Auto or Manual Settings

Most serious photographers, whether amateur or above take pride in being able to shoot their cameras in totally manual settings. The really good ones know and understand exposure, what the effect of long lenses verses normal verses wide-angle lenses can be and the relationship of focal length to distance and so on. They understand the differences between shooting landscapes, portraits, panoramas, panning and action shots, and which lenses and exposures produce the best results in each instance. These photographers sometimes shudder at the thought using anything that is considered "auto" on their cameras under any condition or circumstance. It's a matter of pride and integrity. They might actually have a feeling of "guilt" if they stooped so low as to "autofocus," especially if one of their peer's found out that they had reduced themselves to letting the camera make any decisions for them at all. "Oh the Shame!"

I look at it differently and thankfully so do millions of other photographers and manufacturers. The reason is this, when we choose the various settings our cameras are capable of, whether auto or manual, we know why we want that setting and what effect it is supposed to produce. We know and understand exposure, but we also understand that sometimes conditions are such that it is humanly impossible for the photographer to track and adjust to all the changing conditions we experience while shooting.

Here is an example:

This weekend I was shooting pictures of my grand son as he and his teammates played a baseball tournament.

I proudly set all the settings on my camera as follows:

1. For White Balance-I used auto because the sun and clouds were rapidly intermittent and I knew I would be watching the game and not the specific lighting.
2. ISO-also auto because late in the day we've been having very dark clouds actually make it so dark that shutter speeds become too slow to stop the action. Letting the camera choose the best ISO setting would help keep shutter speeds up.
3. Quality was set to normal. I don't expect to need RAW data here for large format images that I can't produce with the cameras normal setting. I can also get a lot more images on my cards which is important in this instance since I was shooting multiple shots to capture the action.
4. My auto focus was set to continuous servo, and the dial at "Ch" for continuous shooting at 6 frames/sec. I wanted to capture the action with as many images as possible of the batter or the close plays at the bases or in the field. Compose
5. I took advantage the Nikon D300's 51 auto-focus points with 3D tracking so my images would be as clear as possible during the sometimes very fast action sequences. This way I could swing the camera from batter to outfielder to base runner while adjusting the focal length on my zoom lens to get as much of the action as possible. (This is really hard to do)
6. Next I set my camera to "P" or "Programmed Auto" mode. This allows the camera to set the shutter and aperture based on its meter readings regardless of what focal length I am adjusting to, but will also allow me the latitude of over-riding the auto-setting if I choose to.

I had a few other settings adjusted here and there too such as whether my camera should choose shutter or focus priority or both, and so on. So in the end, was I really doing all the work and totally in charge of my images or was the camera doing all the work and giving me the credit for whatever came out? I like to think I was the one in charge. Yes  I delegated certain aspects to my camera and took advantage of the tools and abilities it provides, but I chose which ones and I knew and understood what they were and why I wanted to use them. Subsequently I also knew what to expect from my effort and I wasn't disappointed.

In the end I have roughly 2000 images from four baseball games over two days of shooting to evaluate. No, not all of them will be great or even good images, but there will be a few that are and these will be better than the average shooter could have gotten. In many instances they will be better than the hard core manual shooter could have gotten as well simply because the action is too fast. When shooting at manual settings you need to set your camera for averages and a lot of time that is just what you get, average images.

So, whatever camera you use, learn about all of it's abilities and take advantage of them. You will be surprised and pleased with the results.

Photography Tips

Here are a few things you can do to improve your photography that will apply regardless of what camera you use. These are the basics that every photographer should know and do to get reasonably good pictures out of any camera.

Make sure you have a clean lens. Don't just blow the dust off, but use a clean cloth suitable for cleaning lenses and do it right.

Set up so your camera is stable and won't move as you press the shutter. You can do this a number of ways. If you will be handholding the camera, hold your elbows in against your sides, and stand with your feet apart with one slightly forward of the other. You can also lean against a solid object like a light pole, tree, building or whatever. The best method though is to use a tripod or monopod. I have both but I like to carry the tripod best. If I want to use it as a monopod I just extend only one leg and us it as I would a monopod. I'll add instructions about to how to use these tools later.

Finally the "First" basic thing you need to do is read your manual and learn what all the parts of your camera are for and how to use them. If you understand how your meter works and what white balence is you'll go a long way to getting that shot you want when the light is wierd and you are wondering why your pictures are all dark or yellow instead of like what you saw on the monitor or in the viewfinder.

I'll expand on all these topics in the coming weeks and months so you'll want to check back and see what I've added from time to time.